RGB upgrade for the Nintendo Entertainment System
By tetsujin on 2014-06-08 in electronics
Tags: console modding, electronics, video games
For a long time I was completely unaware of this: the composite video output that comes out of the NES is pretty terrible.
When I got my first HDTV in 2007 and tried my Nintendo with it, I was able to see the problem clearly: straight edges were jagged, shapes staggered oddly as they moved across the screen, and other strange artifacts were appearing as well, like “checkerboard” echoes of on-screen shapes elsewhere in the frame. Initially I thought my NES was in need of repair, but all these things are pretty much normal for the system. It’s all part of how the system renders video. It all looks fine on an old, low resolution TV, but it starts to look pretty terrible when you hook up to higher-quality displays.

My first thought was to look for instructions on how to modify the system for S-video. (In S-video, brightness and color information for the image are carried on different wires, which reduces some of the problems associated with composite video, in which all this information is encoded on a single wire) Unfortunately that turned out to be rather difficult: no matter how deep you dig into the internals of a NES, composite video is all you’ll find. People got around this by using parts from the Playchoice 10, the arcade version of the NES hardware, but there are two big problems with this: First, people have been doing this modification for years, and it’s been gradually depleting the supply of Playchoice systems available for purchase. Second, while the Playchoice played the same software as the NES, the graphics chip didn’t behave quite the same in all cases. The colors were different and some features of the chip didn’t work the same as on the NES. Most NES software looks a bit weird on a Playchoice graphics chip, and some just looks completely wrong. Despite all these drawbacks, for a while I had hoped to someday perform the modification on one of my systems.
Fortunately, fans of the system have been working on new ways to improve its output. One of the more exciting recent developments is a product called NESRGB. It works together with the system’s original graphics chip to produce a much clearer version of the same image – compared to using Playchoice parts to upgrade a NES, it’s more affordable, more compatible, and its output looks better.
The board was unfortunately out of stock for a while, so I had to be patient. Toward the end of May I finally was able to get my hands on it and immediately started modifying my NES to use the board. The first step, removing the NES’s graphics chip, is by far the hardest part, at least if you don’t have specialized equipment to do it. It must be done carefully and gently, or the system could be badly damaged in the process. Once that’s done, the rest of the project is pretty simple – add a few connectors to the back of the machine and wire them up, and do a little basic soldering to get everything in place.


The kit included video connectors designed for installation on the back panel of the machine: a 4-pin mini-DIN for S-Video, and an 8-pin mini-DIN for RGB. Although I don’t (yet) have a use for the RGB connection, I installed both ports as well as an optional feature, the “palette switch”. NESRGB can render colors in three different style: one meant to simulate the colors from an unmodified console, one meant to simulate the brighter look often seen on NES emulators, and one meant to simulate the look of Playchoice-10 hardware. Additionally, the NESRGB can be turned off to allow the original graphics chip to produce the picture. The kit includes a 3-position toggle switch for palette selection, but I wanted something a little sleeker. I installed a small tactile pushbutton on the side of the case, next to the A/V jacks, and I used this together with an Arduino to switch between the different palettes and modes.

As long as I had the machine open, I decided to do another modification: In the Japanese version of the NES, the “Famicom”, there’s a cartridge pin through which cartridges can produce their own sound effects or music. The NES doesn’t have this. So I added a resistor so I can hear these additional sounds when playing certain Japanese games on my NES.

After a few days of working on the project, tending to detail after detail of the video connections and the palette switch, I was finally ready to seal it all up. There have been a few small issues with the video output, but the result is far, far better than what’s obtained from an unmodified console.


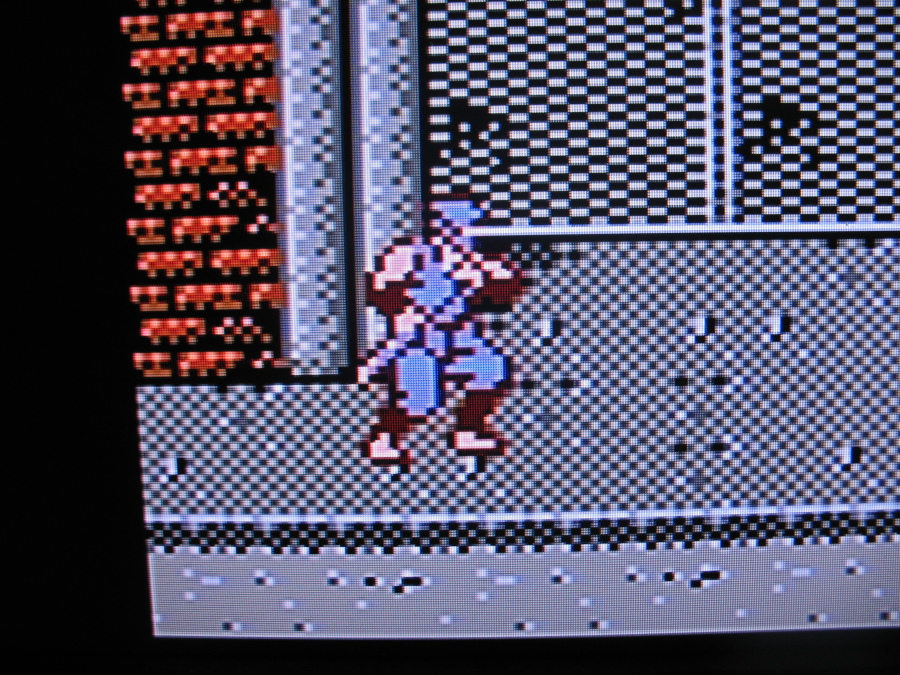
There are some trade-offs, of course: basically, since the NES had lousy video output, many games were designed for lousy video output, with the assumption that you wouldn’t be able to see individual pixels, that they’d blend together. For instance, the sidewalk in the first stage of “Ninja Gaiden” is a big checkerboard, but on the original hardware it all smooths out to a medium gray.


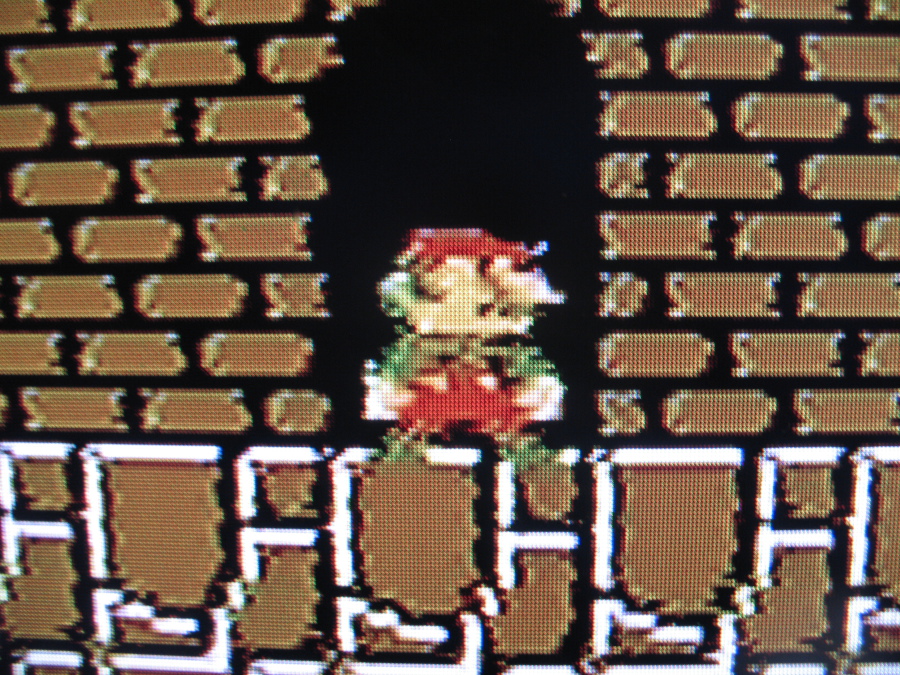
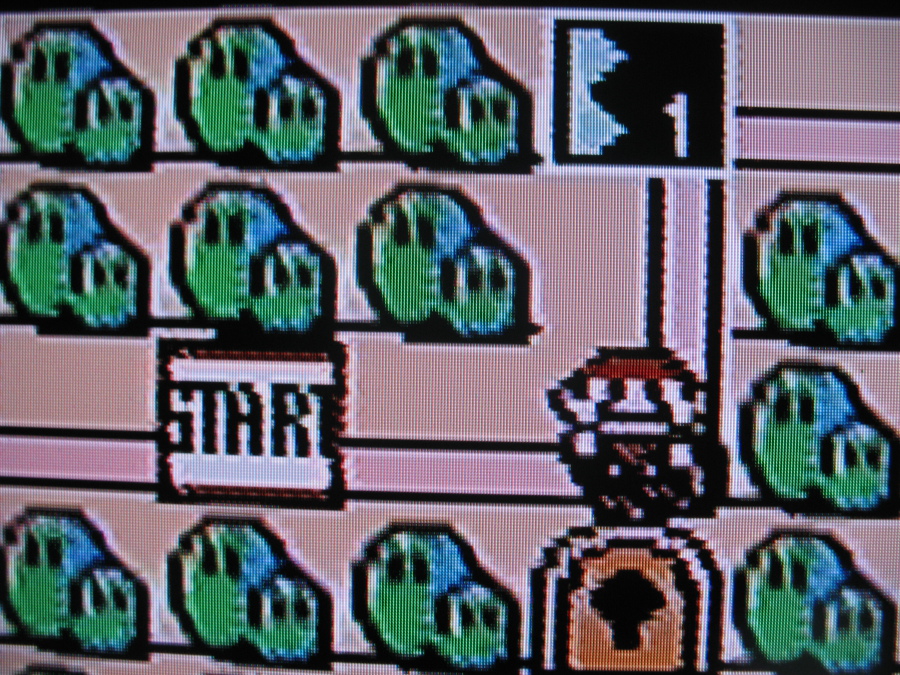
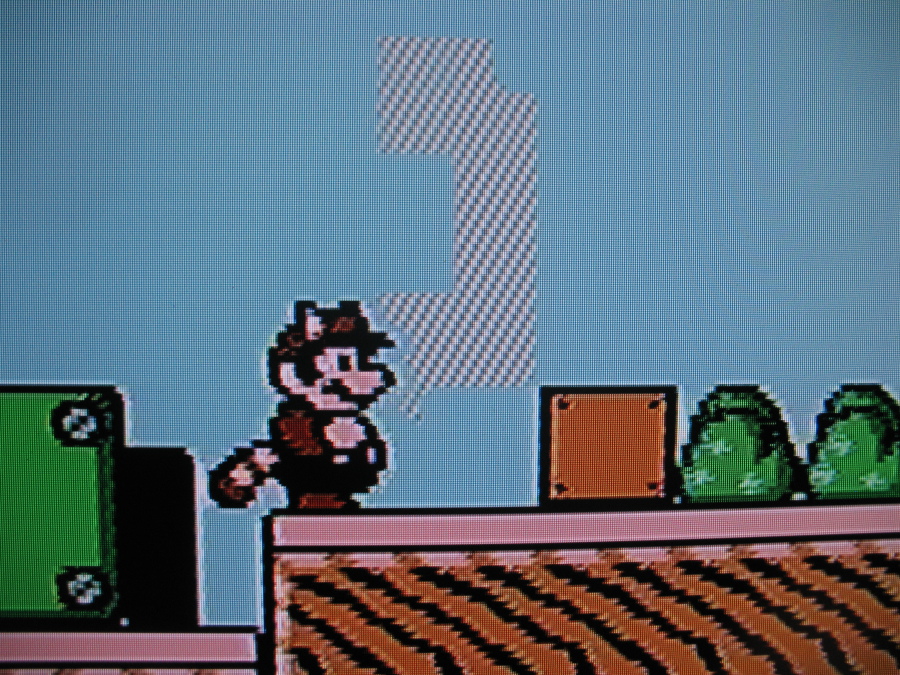
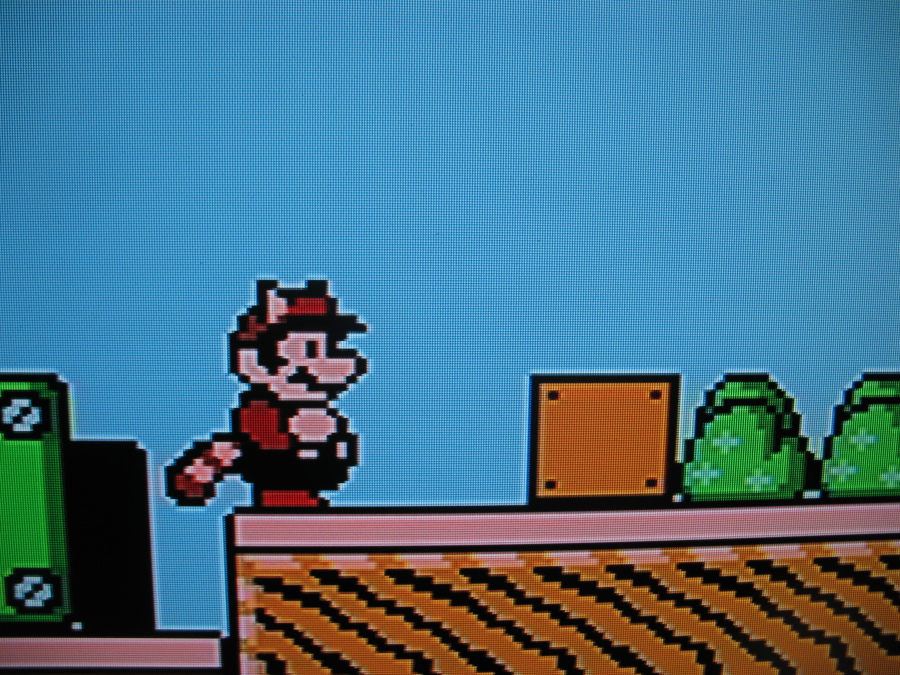
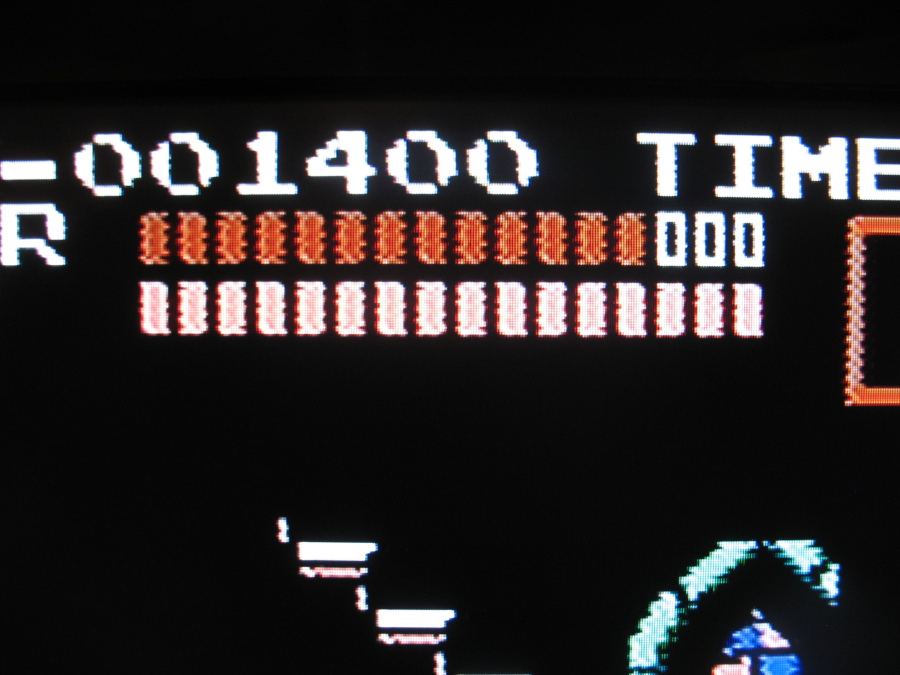
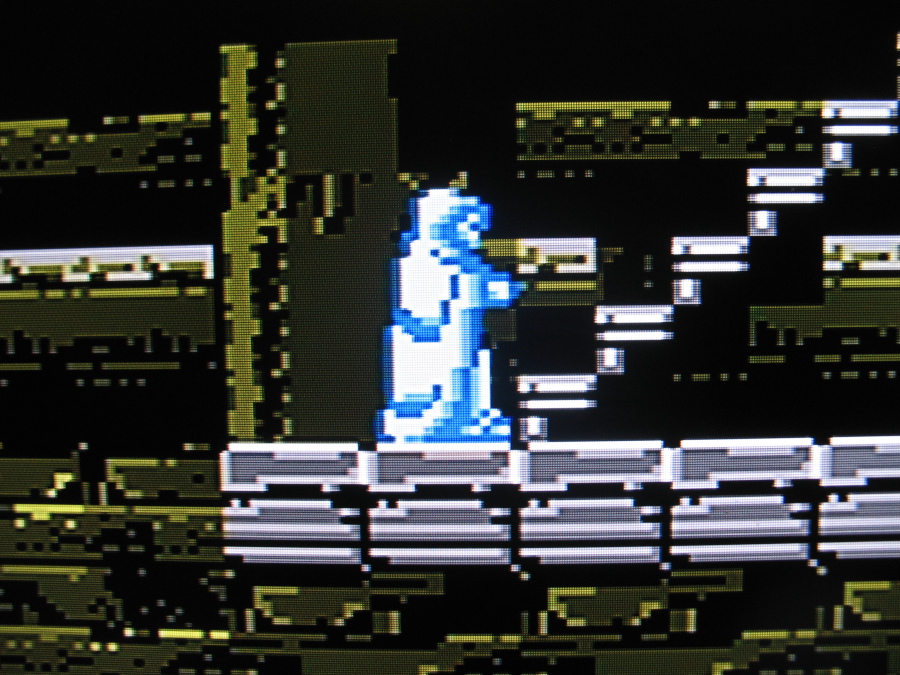
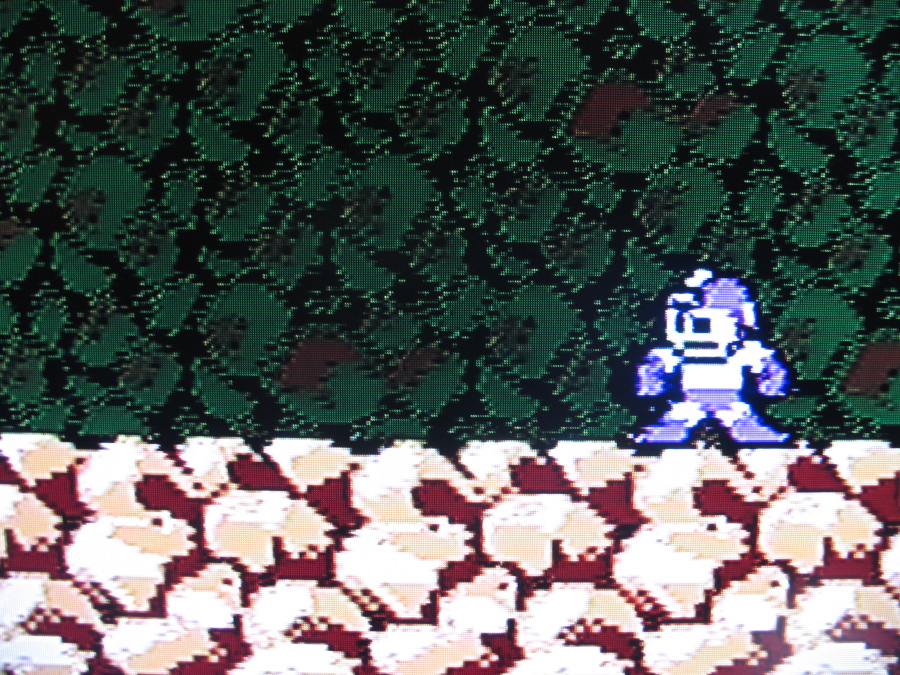
Below are more comparison shots of the NES with and without the mod.
Super Mario Bros. 3


Teenage Mutant Ninja Turtles


Akumajou Densetsu (Castlevania 3)


Rockman 3 (Megaman 3)


Dr. Mario


Wow, this looks great! I’ve been thinking about getting this done for quite some time.
Few questions: Are any of the comparison pictures in SD or only taken from an HDTV? And will any S-video cable do, or is there a higher quality one I should look for?
Thanks! :)
Justin | 2015-06-23 | Reply
I do have a CRT that I use for NES games (a Commodore 1701) but I don’t have any photos from it at present. That monitor supports both S-video and composite, and the picture’s pretty nice, though less clear than on the HDTV. The dot crawl in the signal isn’t as apparent on the 1701. It tends to be visible more as a flickering or jittery look as things scroll. So I’d say NESRGB still looks better on the CRT as well.
As for S-video cables, it’s kind of complicated. I have two systems- the AV Famicom and the old NES front loader. On the NES I cut holes in the back to install the provided mini-DIN connectors for S-Video and RGB, but on the AV Famicom I just used its multi-out connector, which is the same type that was on the SNES and N64. For the mini-DIN connector I can go buy an S-Video cable at a store for pretty cheap. I haven’t run into one yet that wasn’t good. But the multi-out connector is a bit complicated. Because it’s proprietary, you can’t just buy an S-Video cable, it has to be an S-Video cable made for the SNES or N64 (or Gamecube as well? It used the same connector but I don’t remember if it supported S-Video.) Because they stopped selling Gabecube almost a decade ago, availability of the official Nintendo cables has become scarce and mostly what you see on Ebay are cheap, unshielded third party cables. The lack of shielding does degrade the picture quality in my experience. Unfortunately a good S-Vid cable for SNES is pretty expensive.
So what I usually do is buy an official Nintendo composite AV cable (or two actually, since S-Vid has an additional connection), take it apart, and then build it back together, rewired for S-Video. The end result isn’t necessarily pretty but it gives a good picture.
tetsujin | 2015-06-23 | Reply
Thanks for the detailed reply, it answered a lot of my questions! The reason I asked about SD is that my HDTV doesn’t have an S-video port, which I see looks pretty nice paired with the NESRGB from your pictures. So instead I’ve been keeping an eye out for a good CRT, something like a Sony Trinitron from what I’ve read. It sounds like the jump from composite over to S-video is worth the investment regardless :)
Justin | 2015-06-25 | Reply
Why doing it halfway ? There is even better than S-video, the RGB is better than S-Video. Also you can find a lot of SCART cables on the internet (but be careful because SCART isn’t a signal, it can make through composite, s-video AND RGB, so you can be scammed on that)
Believe it or not, but RGB is definitely better than S-Video. At least in europe, we have TVs that support it and I can say that it IS better. In america it is hard to find though … But many TVs can support it with modification (I think that trinitrons can be modified to do that ! be careful to not kill you with high voltage though)
Or you can also buy a good SCART upscaler for 50 bucks
But modding the NES for “only” S-video is a tiny bit a waste because as I said you can have even better
(and if you have other consoles like snes, genesis, saturn you can have RGB without any mod, just the SCART cable)
Deksor | 2015-07-17 | Reply
Why “halfway”? Cost is the main reason. NESRGB S-Video is already far better than stock NES composite. I dropped like $150 to get two NESRGB boards, and the quality I get from S-Video, compared to the quality I got from composite, is worth every penny to me. I don’t feel there’s enough benefit from going to RGB to justify the cost at present.
The next useful upgrade IMO would be to solve the “decombing” artifacts introduced by the HDTV. That probably would mean getting an HDMI converter of some kind, yes. I am skeptical of the quality of inexpensive converters. But mostly I just haven’t taken the time or set aside money to really explore the options.
I also use one of my systems with an old CRT that I had lying around: Certainly I wouldn’t mind replacing it with one that supports RGB (a Sony PVM or something) but it’s just not a priority right now.
Certainly going to RGB would be an improvement, I just don’t think it’s enough of an improvement that I want to dedicate resources to it right now. I’m pretty happy with what I get from S-Video.
tetsujin | 2015-07-17 | Reply
Oh I thought that you wanted the best possible quality, and not just an improvement. But I still think that RGB worth it. Were you able to compare it by yourself ?
But afterall, you do what you want, and I can understand that in america, it may be way more expensive and complicated than in europe (mostly in france, where even the first N64 were made to output RGB, but the circuit is not finished and you have to finish it yourself, but that’s another story)
And for the inexpensive converter, it depends on wich one you take. The guy on youtube “adam koralik” did a lot of videos to talk about that and he promotes one of them that is actually 50 bucks.
That’s funny to see how in the past you couldn’t have “everything” at the same time : one the one hand you had poor video quality but full speed for the games when in the other hand you had very good video quality but slow ass games due to lower screen frequencies.
But in the end, you are the most lucky, because you can mod (or just buy the necessary stuff) to have the same quality when we are trying to have the right speed, but most of the times, when we’re switching to 60hz our games are running too fast or doesn’t boot due to region lock or just a crash.
Deksor | 2015-07-17 | Reply
The S-video I have now is a huge improvement over composite. I’m sure RGB will be even better (I’ve seen emulators, I’d expect similar quality), but from what I’ve got now there’s not really that much need (or even room) for improvement. Like sometimes there’s a tiny bit of color bleeding, or a bit of interference in large color fields. Sure, it’d be great to get rid of that. But it’s not a priority for me right now, and it’s not going to be the kind of night-and-day difference I got by going from NES composite to NESRGB S-video.
As for cheap HDMI converters, the problem there is that the market is flooded with garbage. I’m sure there are some cheap converters out there that are decent, but the problem is that as soon as a good cheap converter hits the market and people start to recognize its greatness, a dozen inferior clones will hit the market and throw everything into confusion. I don’t want to mess with it. Right now I’m mostly gaming on my old (s-video) CRT anyway.
tetsujin | 2015-08-17 | Reply
I want to revisit Deksor’s question, of why I did an RGB mod but didn’t follow through with an RGB signal path, and instead stuck mostly to S-Video. I feel like I went a bit overboard trying to justify myself – saying dumb things like that there was very little room for improvement. Looking at it critically, of course there’s room for improvement over S-Video. But for me this was a good stopping point: I got a significant improvement over the NES’s original composite, solving not only the inherent picture quality problem with composite but also the NES’s dot crawl and the mysterious incompatibility between the NES composite signal and the LCD TV I was using at the time. It made a huge difference, and I didn’t feel the need to drop an additional $200-$300 on a scan converter or high-end CRT to make it even better.
More recently I’ve begun revisiting all this: Our current living room layout doesn’t really lend itself well to the inclusion of these old systems. This has led to a rather awkward setup. So in planning out my new workspace I decided to dedicate some of that space to my old gaming hardware, and I picked up a CRT off the street to use as a display.
For now the CRT set-up is still using S-Video, but I’m planning to at least get an RGB-to-YPbPr component converter. (This should yield results close to RGB-quality – though still inferior. But for me it may be as it was with S-Video – good enough that I don’t feel the need to push it further.) I’m also considering options such as RGB-modding the set – though I might be better served by fixing some of the set’s other issues first.
tetsujin | 2018-07-30 | Reply