I began my modeling hobby in earnest in high school (Early-mid 1990s, for me). At that point I was feeling a renewed wave of nostalgia for Star Wars, and so at the time I was collecting the old model kits. I didn’t know a lot about model-building at that point so the work was kind of sloppy, and only a few projects were ever finished. Around this time my grandmother bought me a Star Trek kit as a gift. At the time I was a bit annoyed, it seemed to me as though she had bought me the wrong sort of thing. (Ungrateful bastard, I was.) But I gave that Enterprise-A kit a bit of work, before botching it and throwing it out, and during that time my dad said to me that it’d be cool if I put some LEDs in to work the navigational flashers and such. (That never happened.) This whole deal kicked off a little bit of Star Trek revival in me for a while, so I bought more kits which I botched or simply never completed.
That was the period in which I first built and painted some kits to completion. It wasn’t until about five years later that I reached the point in the hobby where I was aggressively stockpiling, completing multiple projects, buying equipment, learning the right ways to do things, and so on. By this time I had moved on to anime, mainly Gundam. Then, sometime in 2005, as I was coming off the tail-end of an overwrought Gundam project, I found the 1:1000 scale Polar Lights Star Trek kits in the local Target for cheap money. At the time I knew next to nothing about Trek kits from the old series, so I thought these were some reissues of some old Aurora kits. Nevertheless, Target is good at promoting impulse buys, so I got one. Around the same time, PL’s refit Enterprise kit caught my attention – but I don’t remember if I had resolved to get one at that point, yet. The upcoming Fine Molds ‘Falcon was also competing for my interest at this stage. I remember that at this point I thought of the original Enterprise as this flat, boring, cheap design: I saw no merit in it when compared to other Trek designs.
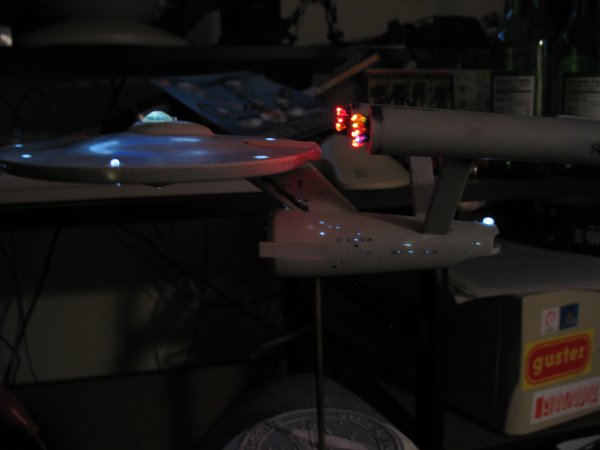
Anyway, around Christmas time I came up with this idea that I would try building this PL kit in a couple weeks time as a gift for my dad. He introduced me to Trek when I was a kid (one of my earliest memories of the show is the Corbomite Maneuver episode – thinking the glowing thing in space looked like a Rubik’s Cube, and wondering why the alien used “relish” as a verb and not a condiment), and got me into computers and electronics – and more recently, helped to pique my interest in microcontrollers through his own interest in the subject. As typically happens with my projects, this one slipped past its deadline and grew more complex. I decided that this model would not only have lights, and flashers, but that I’d also take some kind of shot at doing the nacelle lights. I missed the Christmas deadline, I missed the birthday deadline, and now I’m in the final hours of the Father’s Day deadline and finally starting to paint the thing.
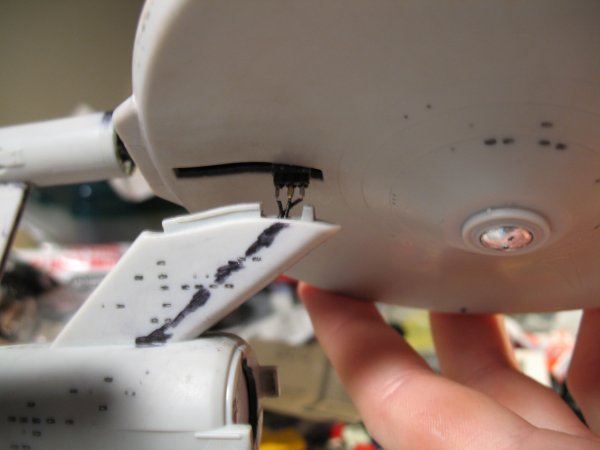
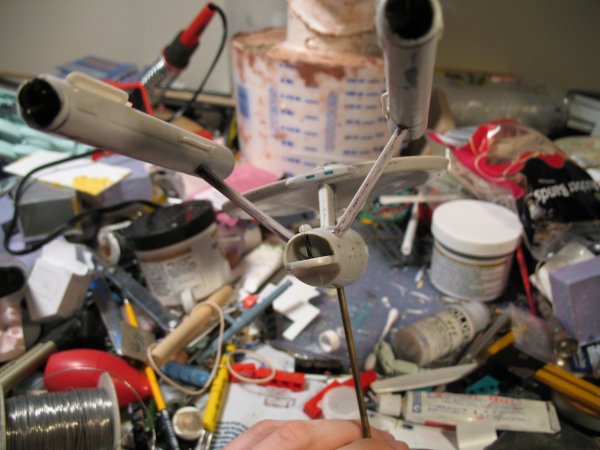
The nacelle lights are a circuit I made myself, running on PIC 16F648A microcontrollers, one in each nacelle. I wrote the program for the nacelle lights myself, and wired up ten surface mount LEDs per nacelle to wires. The two PICs have slightly different programs to ensure the pseudo-random flashing patterns are never in sync with each other. The LED units at the front of the nacelle are isolated from the PIC circuit by detachable connectors: this has come in handy on a number of occasions for testing the LED units and the PIC circuits, swapping out things when they fail, and avoiding damage to the PIC circuits when working on the LED arrays. Between the wires, the resistor buses, the connectors, the PICs, and the connectors for programming the PICs, each nacelle is pretty much stuffed with wiring. In addition to power lines, the nacelle struts also carry an extra wire from one of the nacelles, which connects to the navigational flashers in the saucer section. Very late in the project, however, after the nacelles were glued and puttied, some of the LED wires broke – and while repairing those it seems that I damaged the PIC in the starboard nacelle which had been driving the navigational flashers. (It was no longer capable of turning the nav. flashers off, merely making slight changes in their intensity. I think I somehow fried the output transistor for that I/O line.) I needed a new nav flasher line, and I didn’t want to install and program yet another PIC, so I opened a hole in the side of the port nacelle so I could attach a wire to its nav flasher I/O line. This hole then had to be patched with styrene and polyester putty – I really hope I made that patch strong enough to not re-crack after it’s painted! Modeling would be so much easier if I could just learn not to make mistakes.
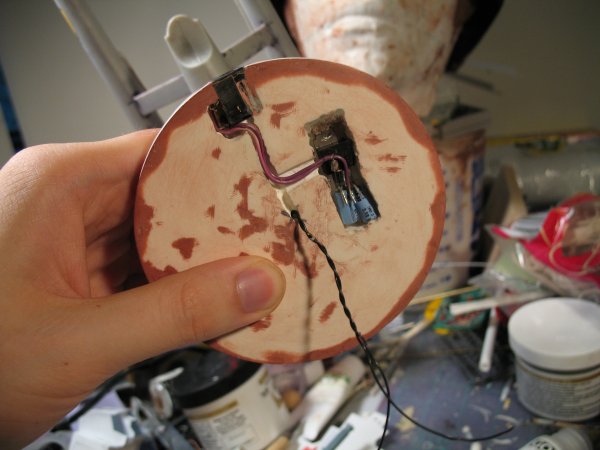
While I was working on this project in March, I still hadn’t worked out my exact plan for the base. Then I saw the resin bases sold on Starship Modeler’s store, the “The Model Base” ones. The paintjob of the one on the SM store made me fall in love with that particular hunk of resin, so I bought it. It’s been a lot of work bringing the base up to spec – the bottom surface of the base was basically the open end of a mold – and the resin surface on this side was crooked. It was a lot of work fixing that. There were also a bunch of pinholes on the outer edge and on some of the lettering… par for the course I suppose. It took me a while to figure out how I wanted to handle the power supply – I ultimately scavenged a power jack from my PIC programmer (I replaced it with another jack, of course – the one from the PIC programmer was simply much easier to install in the resin base than other types locally available) and installed a voltage regulator and a diode (to protect against overvoltage/reverse voltage – especially those damn PICs! I don’t want them getting fried after all my hard work!) in empty space that I drilled out of the bottom surface of the base.
I’m hoping to finish this project over the next twelve hours or so. I’ve tried this sort of last-ditch modeling effort before and it never, ever works. Never. At all. Ever. I’ve learned that lesson again, and again, and again, and it’s always the same. Maybe it will work this time, though.


Post a Comment