Yutaka Izubuchi, mecha designer of Gundam: Char’s Counterattack and War in the Pocket, made an appearance at Anime Expo 2006. Naturally I was delighted at the chance to meet him. Since I was going to the con I also made plans to enter the model competition there: by this time my Wing Zero model had made the rounds to various model contests, but I also felt I’d rather bring a model of an Izubuchi design. Not having a lot of time before the con I decided against my HGUC GM Command that was already in-progress, as it was too complicated, and my HGUC Gelgoog Jager due to mishaps involving its antenna – looking over my options I decided on an old 1:144 Geara Doga I’d started years earlier. I resolved to do a quick build and get it done on time.
As it turned out, I didn’t get it done on time for Anime Expo, Otakon, or Granitecon, and so as a result I haven’t had contest entries for any model contests this year, not since Tekkoshocon anyway. I did succeed in getting quite a lot done – most of the structural work, including a LED monoeye, new details on the forearms and knees, installation of replacement hands by Kotobukiya, etc. I had also started work on filling in the back-side of the large, folding shield, but because time was running out I decided to save that project for after the con. By the time AX rolled around the model (minus the folding shield) was ready to paint – but for me painting is generally a time-consuming process and I failed to take that into account.
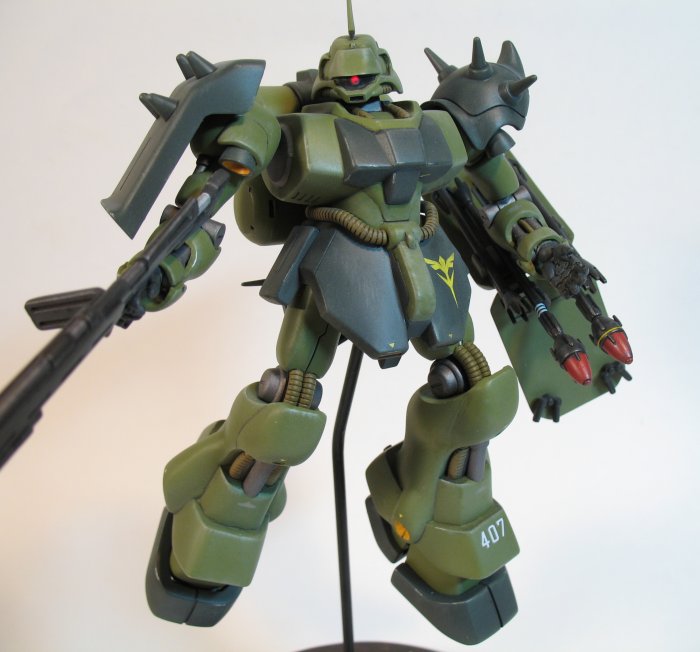
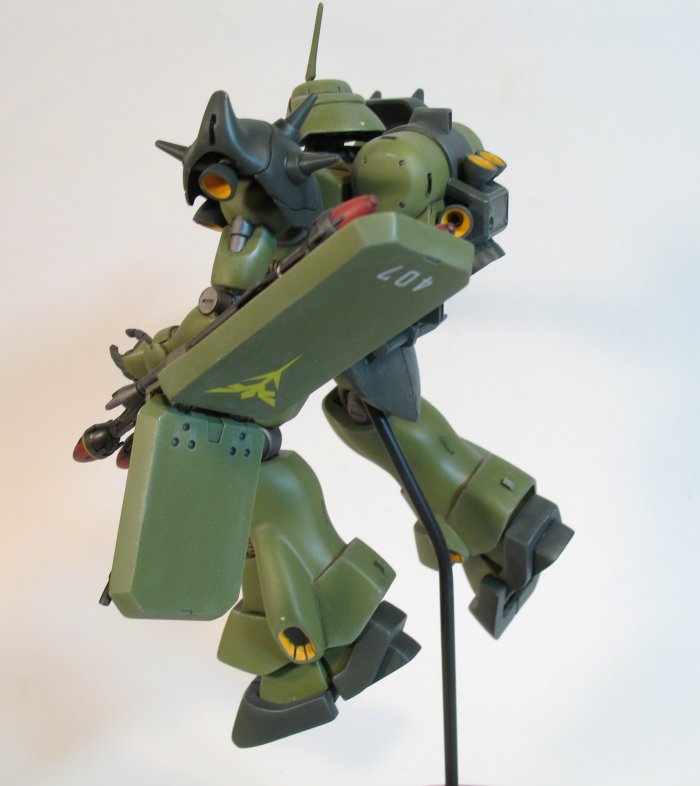
This project is the first I’ve given a proper base: the base serves a practical purpose as a battery holder but additionally I think this particular kit looks much better in a flight pose, and so I think the base is very important. I also feel that the base improves the overall presentation, and so I want to start including bases with most of my projects from now on.
This project is, by my standards, close to “out-of-box”. I made the following alterations as part of the construction:
- Installed LED monoeye in head
- Replaced exhaust-port-things in back of head with actuall thruster bells
- Adapted backpack for a polycap connection (this gives me a convenient way to access the wiring inside the torso)
- Sunk the thrusters on the sides of the backpack deeper in so they wouldn’t look quite so fake
- Carved away original forearm “internal” detail, replaced with styrene rod, Kotobukiya mecha pipe, and springs
- Replaced butt-ugly kit hands with Kotobukiya metal hands
- Filled in hollow back side of folding shield, added back-side detail based on illustration in instruction manual
- Drilled out the grenade launcher in the rifle, and inserted a minus mold to represent a grenade
- Corrected the shape of the beam saber hilt that’s stored on the back skirt (kit part was lacking the flare at the butt end of it, so that the part could slide into place. I used part of one of the other saber handles included in the kit to make the deactive one correct. I also detailed up the emitter areas a bit)
- Altered various areas so they could be assembled after painting
Various things gave me some trouble on this project. The antenna broke off five or six times, I screwed up the paint job in various ways, and various parts that I dull-coated wound up transferring once they came in contact with the parts they’re supposed to come in contact with. I was very un-careful with the wash and rushed through the decals. I even had some detailing mishaps result in a few areas of paint getting chipped away – those I just had to patch as well as I could. I also had bouts of indecision about just what kind of weathering or finishing work I’d be doing – early on the plan was for dry-brushed faded edges and pastel weathering. Toward the end I finally did the dry-brushing (not too gracefully, either) but by the time it was ready for pastels I was ready to move on to other things, so I decided to leave it be after the last dullcoat was on and the wiring was done.
With the completion of this project I was inspired to paint my Nintendo DS in the same color scheme. I’m very happy with how it turned out.


This is one excellent Geara Doga! The Army green colour combo with the yellow accents is truly appealing to the eye. I think this was the first Geara Doga I ever saw when I came across it on BAKUC some time ago, and ever since, I have been a big fan of your work and this MS design. I will work on one myself now, will get the Rezun custom suit though. You have a good website going on here, interesting stuff, I’m glad I found it! keep up the good work!!
F-Genetix | 2009-04-17 | Reply
Thanks! This is the old Geara Doga kit from 20 years ago – if you get the HGUC version you should have a much easier time than I had with this thing. :D
tetsujin | 2009-04-20 | Reply
Mighty impressive what you’ve done with this kit.
I have on of these also, but how in the heck did you hide the seams going down the legs!?
RedSarge | 2010-05-28 | Reply
Basically, I hid the seams by gluing, sanding, and puttying them. The main area of difficulty is that little nozzle that sticks out of the front of the knee area – that’s got a seam line running straight through it. To deal with that I cut the original nozzle detail away and replaced it – with a Kotobukiya Mobile Pipe, I think… A lot easier than trying to clean up a seam on such an irregular surface. (Plus it let me make that bit of detail more accurate – the nozzle is supposed to be recessed into the surface. On the kit it just sits on the surface…)
I take pride in my seam work – I try very hard to make the parts look as though there was never a seam there to begin with.
tetsujin | 2010-05-28 | Reply