The Alpha and the Amiga
By tetsujin on 2024-09-13 in Models
Tags: 1:72 YF-19
When Hasegawa released the original VF-1 Battroid kit, the kit’s detail impressed me and I called it “the greatest mecha model kit of all space, time, and alternate dimensions”. Suffice to say I’m a fan. But when it comes to Macross, the sequel “Macross Plus” is the one I was most enthusiastic about initially, and in my earliest days in the hobby one of my goals was to get the Macross Plus mecha in model kit form. Hasegawa released fighter-mode versions of the two main Macross Plus mecha back in 2004, but it wasn’t until this year that they finally made a battroid version. I wasn’t sure I liked this kit when I first saw it, but I decided to get it, and I finally received it around the end of August. Since then I’ve been working on it a lot and enjoying it. I don’t know if I’d elevate it to the lofty heights I used when describing the VF-1 battroid kit (these days, Kotobukiya’s Armored Core kits have taken over the top spot in my mind) but it’s been a fun and exciting build so far.


Of course as much as I love Hasegawa’s Macross kits, that does come with some caveats. The robot kits aren’t as durable as people tend to expect from working with Bandai’s Gundam kits. One issue with the VF-1 Battroid kit is that some of the joint pegs have a fairly weak connection point to the rest of the part. Hasegawa has changed (and mostly improved) their methods of creating robot kits over the years, but there are a few joint connectors on the YF-19 battroid kit which share this flaw. When dealing with something like this, it’s best to identify the problem and reinforce the joint as soon as possible. If you wait until the peg breaks off, the repair gets more complicated.


Another minor annoyance with this kit is the shoulder joint: It’s a three-part hinge with a cylindrical center and two plates connected to an axis which runs through the cylinder. The problem is that the two plates don’t lock together on the axis, so as you change the pose of the shoulder, the joint gradually works itself apart and forms gaps. This probably wouldn’t be a big deal in practice (you don’t see much of the shoulder joint when the pauldron is on), and it’s possible that joining the two hinge plates together at the upper arm end would be enough to keep the hinge together… But I can’t verify that, because I didn’t want to glue the hinge together without knowing it would really hold together properly… So it may have been unnecessary, but I added a metal wire to hold the front and back halves of the axis together and keep the joint from working itself apart.


Fans of transforming robots will often complain about what they call “kibble”, bits of the robot’s alternate form which hang off the robot form. I don’t always feel like that’s a problem, as these parts become thematic elements that tie the robot form to the alternate mode. In Transformers for instance, there were a lot of robots that turned into cars, and so in robot form they’d have headlights and grilles on their chests and car doors hanging off their back like wings. To me that’s not “kibble” in the negative sense, it’s good theming. But the YF-19, as much as I love it… I generally don’t like how it stores its wings in robot mode. They hang off the hips. It looks cool but it also looks very fragile.
One of the ways Hasegawa’s Macross kits have changed since the VF-1 battroid is that there are more trapped assemblies now. In this case, the wings are sandwiched between the parts for the wing glove. As-is, you can’t close the seam on the wing glove’s leading edge without trapping the wing in there first, which makes it difficult to paint and decal certain areas of the wing. To address this I took one of the wing’s mounting holes and turned it into a slot. The other two I left as-is. With the wing glove glued together at its front end, I can separate the back end of the wing glove (where the two parts don’t join) and slide the wing into place. This should make the painting and finishing stages easier.


In Gundam kits, assembly tends to be very simple, but this leads to compromises. For instance, if a part is like a rectangular box with detail on three different sides, they might avoid introducing seam lines in the part by molding the whole thing as a single part on the runner. But that means the detail on the sides of that box shape can’t be represented well in the mold, because it winds up molded from the wrong angle. One of the things I appreciate about Hasegawa’s kits is they don’t do that. They’ll put a seam on a part if they have to do so to make the detail correct. But that can lead to challenges in aligning those parts. The forearm on the YF-19 is a case like this, they built this box shape out of four panels (top, bottom, left and right) with a fifth part in the middle acting as a framework. So there are seams that need to be removed, but doing so requires careful alignment. In the end I didn’t get it quite right and had to smooth it out with some putty.


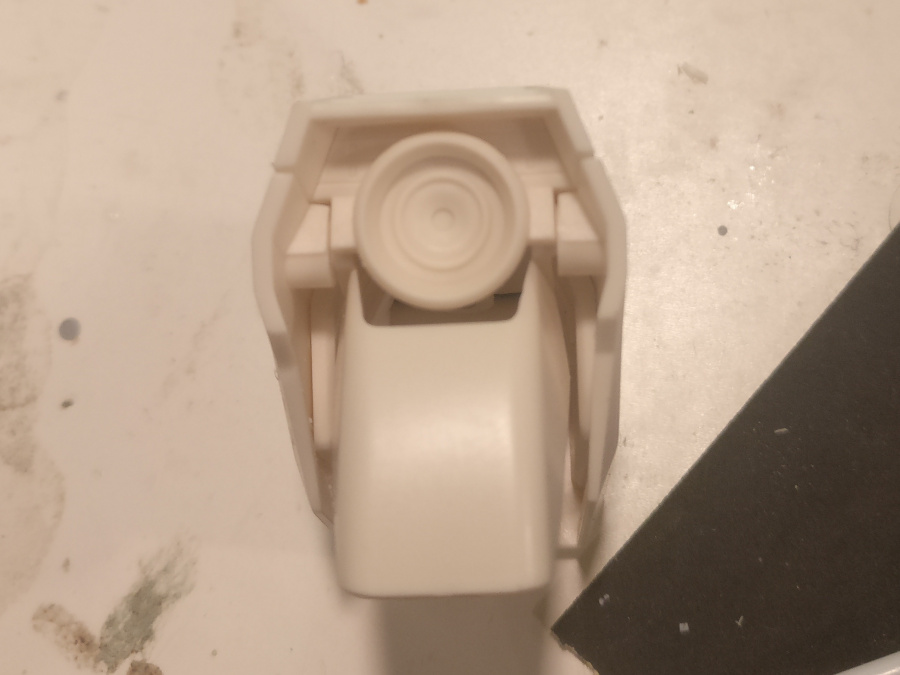
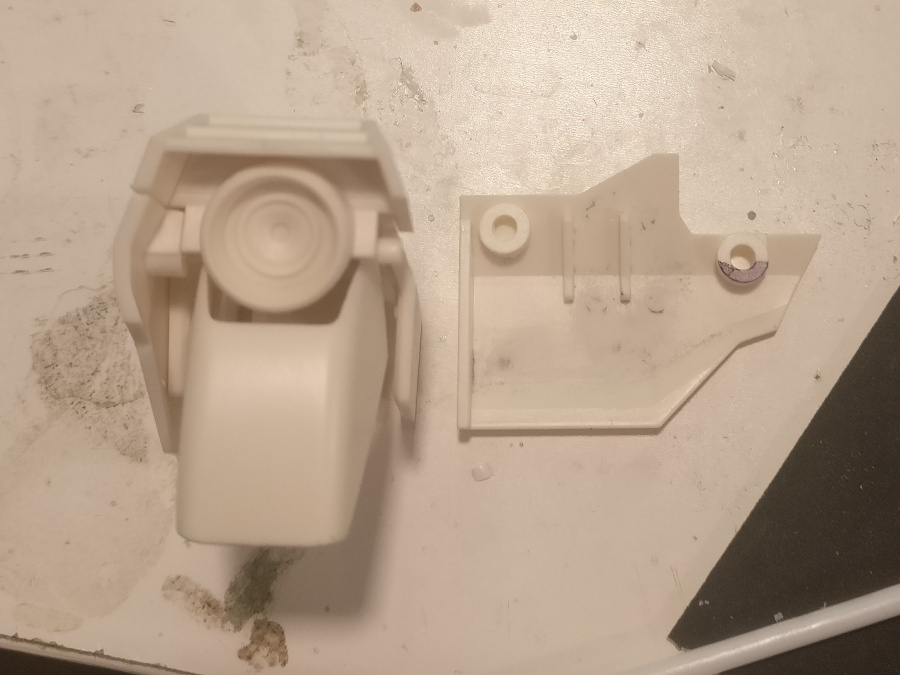
The shoulder pauldrons have a somewhat difficult seam: The pauldron has a structural part inside, and then panels attached on the front, back, and top… And then this one other part that goes on the top outer corner of the pauldron. There are two major difficulties here, first is getting the surface of that last part to sit level with the front and rear plates of the pauldron, second is that the seam between those parts tends to show a bit of a gap in places. Hasegawa may have molded the part like this to capture the detail better, but also there are some optional parts that can be mounted to the shoulder pauldrons, and there’s an alternate version of that last part which is used to connect to them. Hasegawa may have done it this way so people could swap parts between the two configurations. Personally, I’d rather commit to one and make it look good. Getting the parts to align properly took a fair bit of work, trimming down the surfaces where the front and rear plates met the structural part of the pauldron and so on.


 on the inside of the front/rear plates to see if removing them would correct the alignment.")


Of course like any kit there’s some good ol’ seam work to be done…


Overall it’s been a lot of fun so far. My experience with the hobby has been a lot of frustration lately. I’ve worked on a number of projects, made a lot of good progress on a lot of things I haven’t posted here yet… But nothing completed, not since the Scopedog I finished 2 years ago. It’s frustrating, but this time with the YF-19 has felt rather more fruitful. Sadly it’s still not far enough along to be ready for my local model show, but it’ll be a nice build when it’s done.
Post a Comment