The One-Week War
By tetsujin on 2013-10-01 in Models
Tags: 1:100 Rick Dias
It’s a classic story: the deadline for some modeling contest creeps up on me, and then I rush to get something ready to show. It never works. But this time it was at least a lot of fun, and I made a lot of great progress on a new project.


I got this kit as part of a trade, kind of on a whim, but when I got my hands on it I decided I really liked it. Bulky kits are just really cool, and while I wouldn’t call this thing anime-accurate, its chunky design style gives it a very bold look.
This time the event in question was Patcon, the show held by my local IPMS club. This was the first Patcon held by the club in several years, and I was excited to see it back. I wanted to be a part of it, so I took a bit of time off and spent most of the last week prior to the con working on my Rick Dias.
This is my first project in my new workspace. We moved this year, and it’s taken a long time to get things settled to the point that I could get anything done.


I haven’t built a lot of MG kits, and so this one presented me with a challenge I’m not used to coping with: there are seam lines on the legs which must be dealt with, but to glue those seams together means trapping the inner frame, locking the whole leg together. As a result I think it will be a bit challenging to paint the legs.


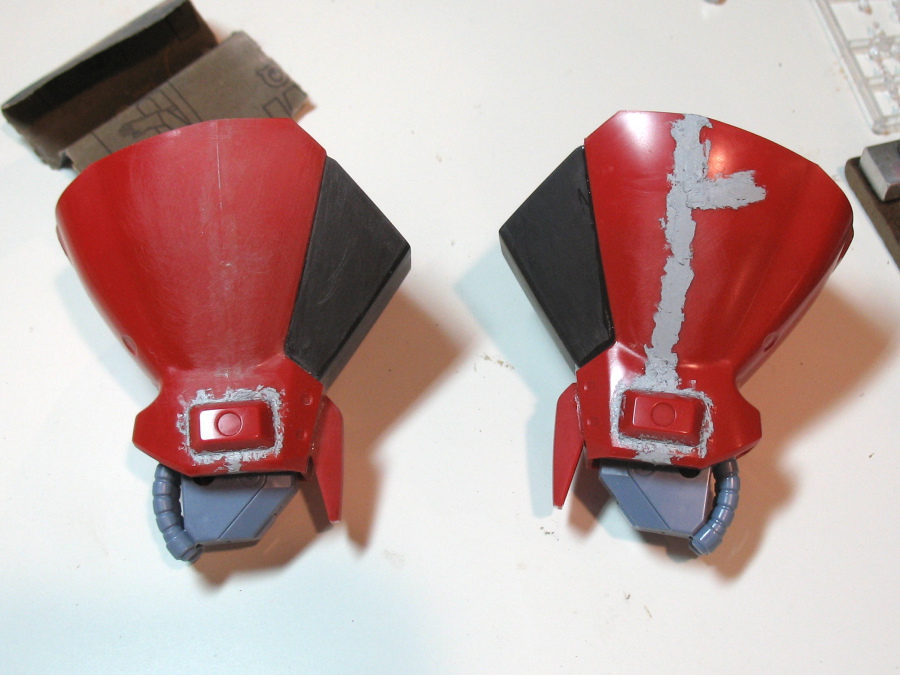
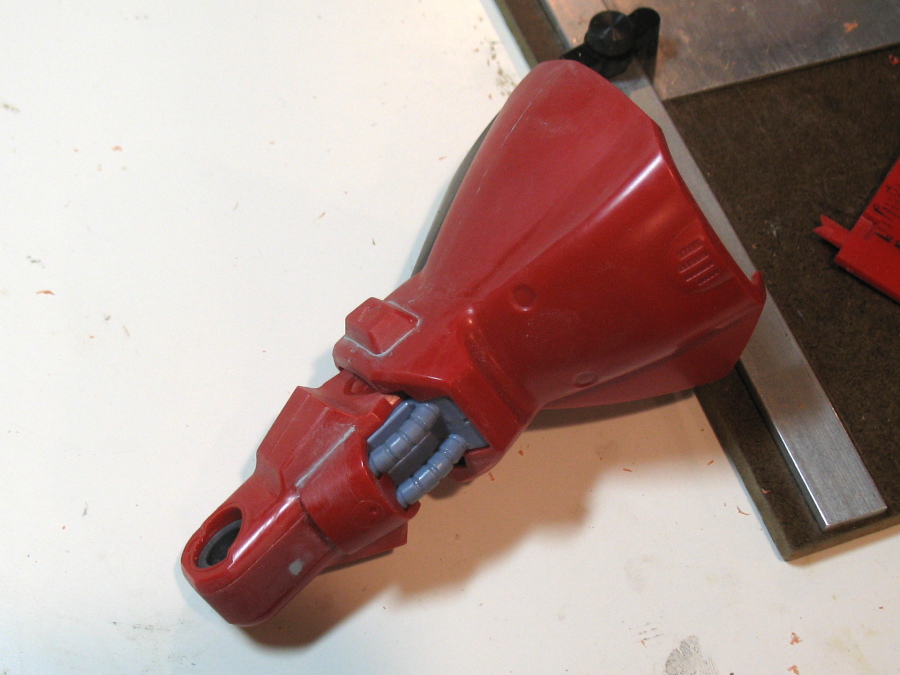

The arms appeared to be somewhat easier to deal with than the legs, due in part to a more HG-style construction and the seam on the upper arm being hidden well enough that I didn’t feel I needed to treat it.


I altered the arms a bit to deal with seams on the forearms and simplify painting a bit.


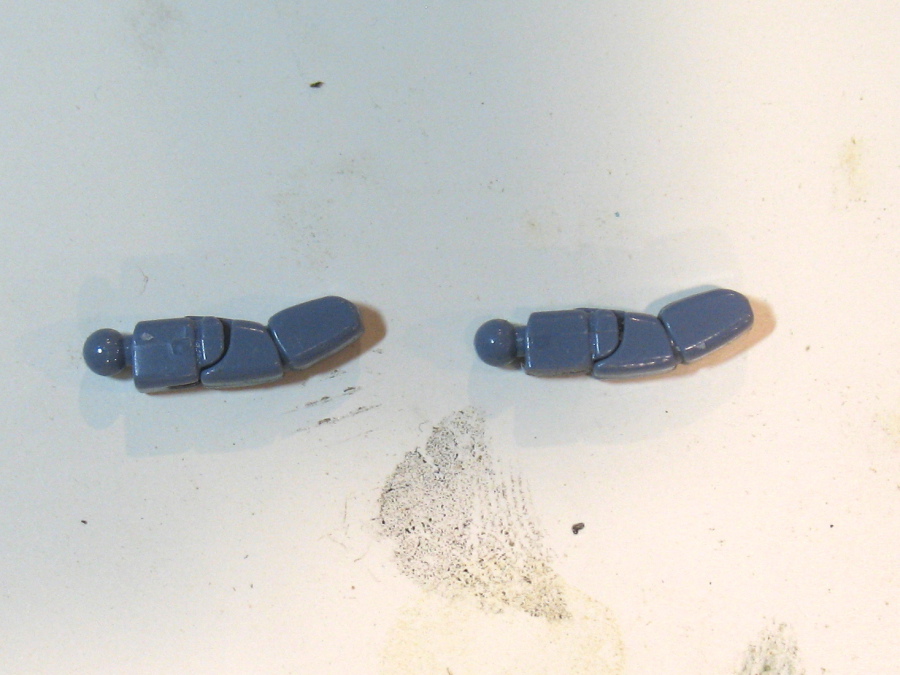
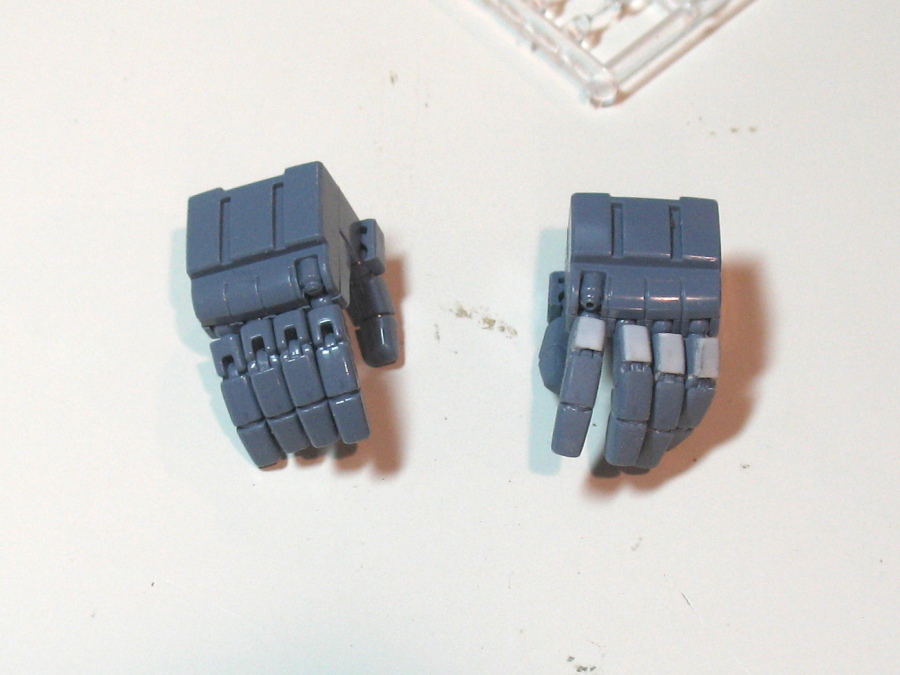
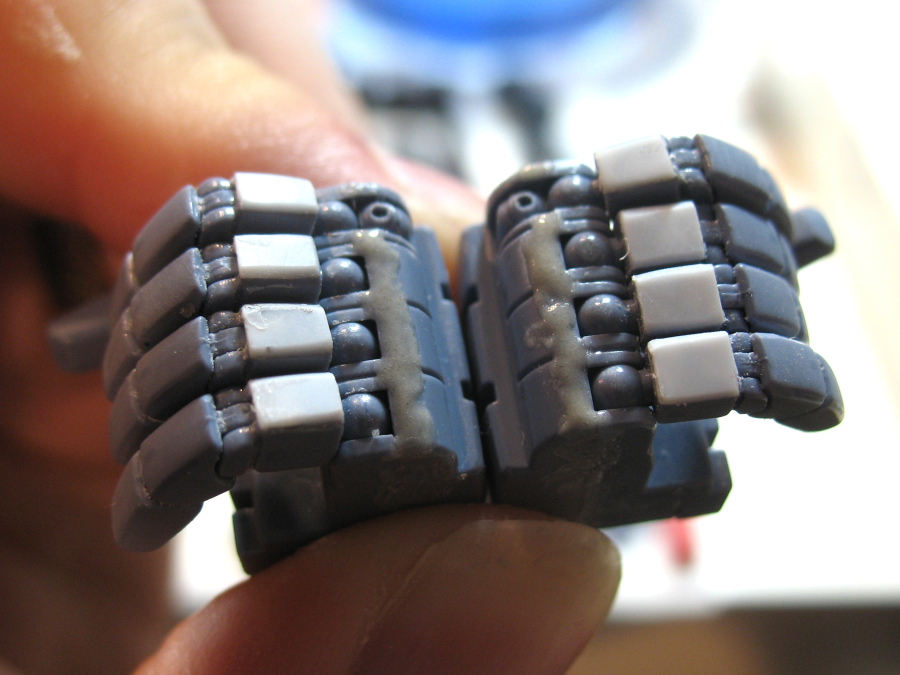
The hands presented some challenges: the fingers are jointed at two knuckles, but the second knuckle joint has a gap around it, so I replaced part of the finger with styrene plate to cover up the gap. The fingers also had mold separation lines and slight warping issues that make them a bit frustrating to deal with. I drilled out the birdlime launchers and did my best on the seam where the two halves of the hands meet. Gotta love these beefy Zeta hands.


When building the skirt thrusters I ran into an issue I’ve been grappling with on the MG Geara Doga: the thrusters have colored inserts which make the thrusters look too thick. I decided to use the existing parts but carve them down a bit.


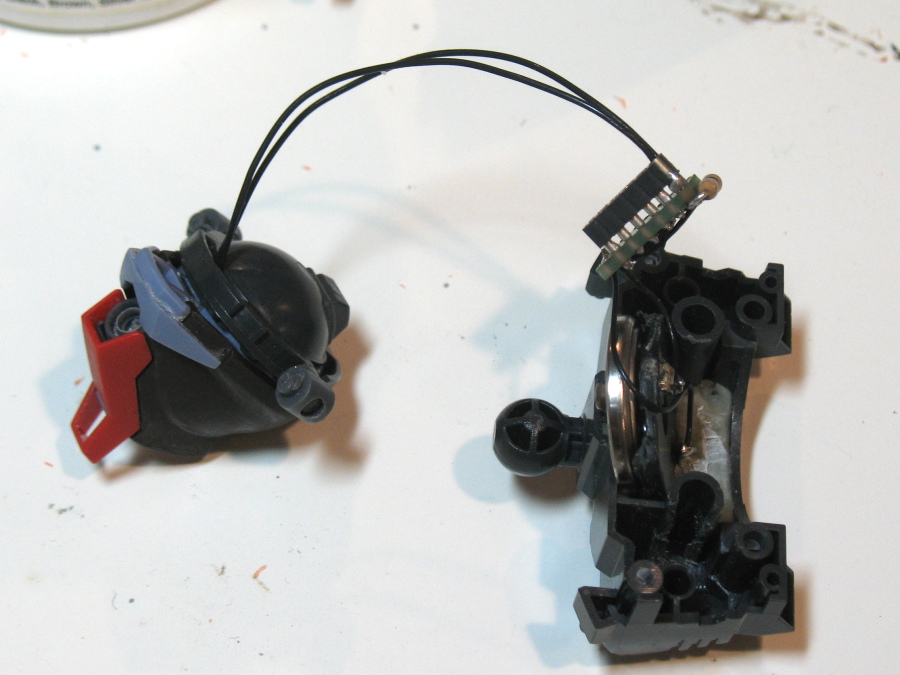
A while back I established this rule for myself: monoeyes should always be lit. Usually I like to stash a battery holder somewhere on the model, so it’s easy to power the LED even if I don’t have a display base to hide a power source in.

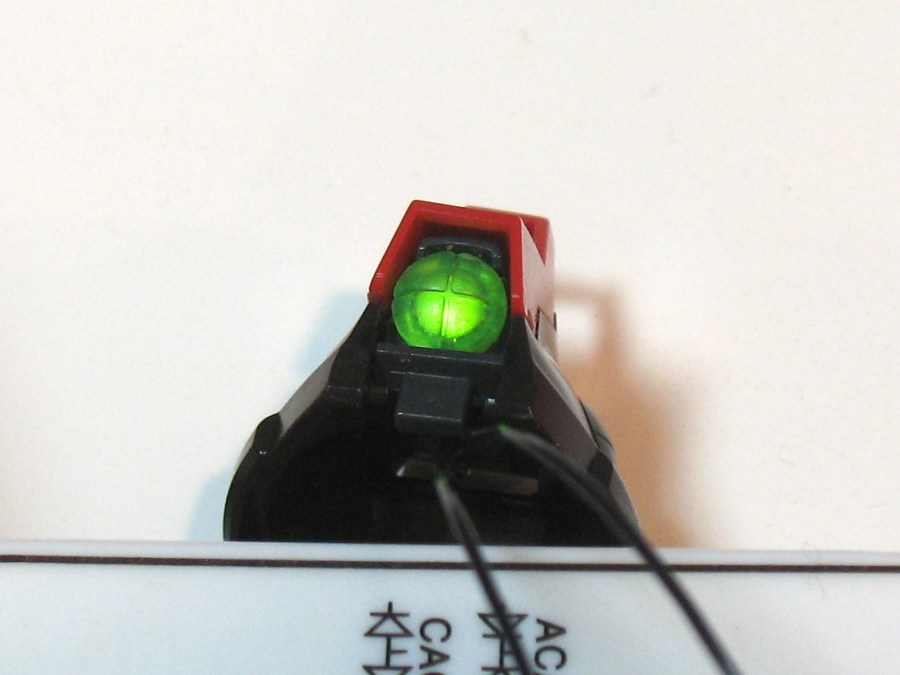


I decided that the bottom of the chest block would be a good place to stash a 20mm coin cell holder for power. When the model is assembled the opening is covered by the belly part, and the battery holder can be accessed by removing the belly and the armor from the back of the torso.
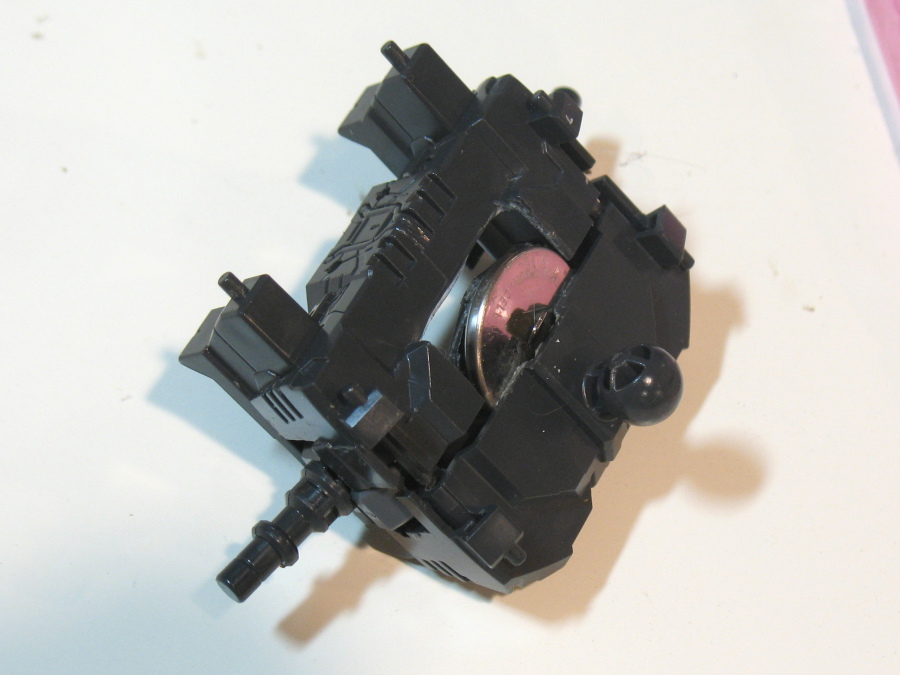

I wanted to install a microcontroller to control the LED in the eye, give it a bit of dynamic behavior when it’s on display. I used one of my many Raven boards which I designed a few years back. One of the really handy features of these boards is it’s easy to cut ’em down to a smaller size if you can spare some of the I/O pins. I puzzled a bit about where to hide the microcontroller (it’s harder to hide things in the chest block than you might think) and ultimately settled on a location in the armpit.


The weapons were a bit challenging due to the seam all the way around the perimiter. I probably could have reduced the work needed a bit by aligning the parts a bit more carefully before sanding. This kit has a hand-peg system for the weapons, but the weapons will be back-mounted a lot of the time, so I removed the pegs so the weapons would look nicer.


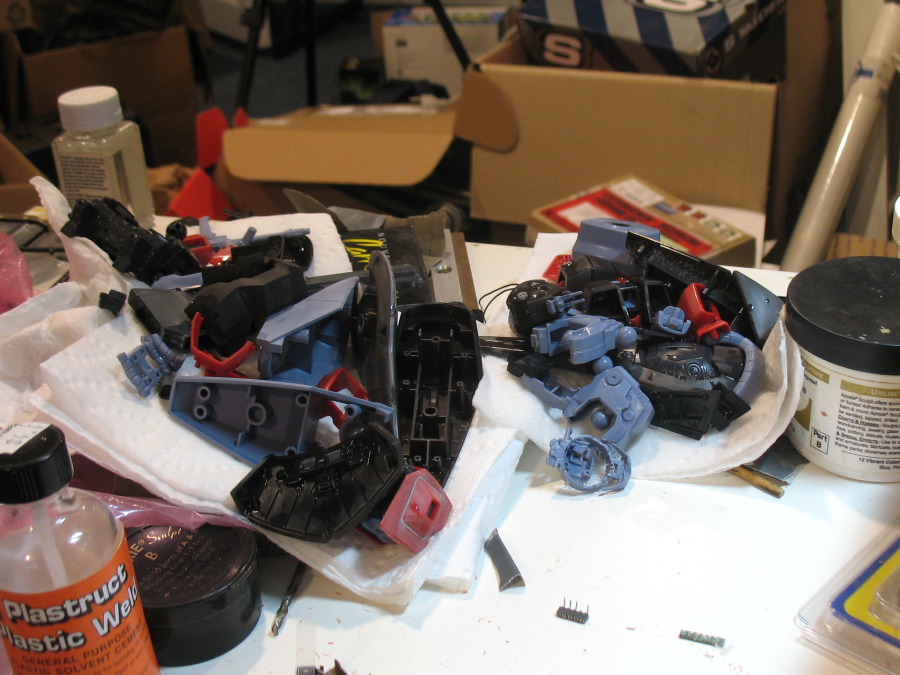
As more and more stuff got done the project got to that point where I had to start going through everything, making sure it was ready for primer.
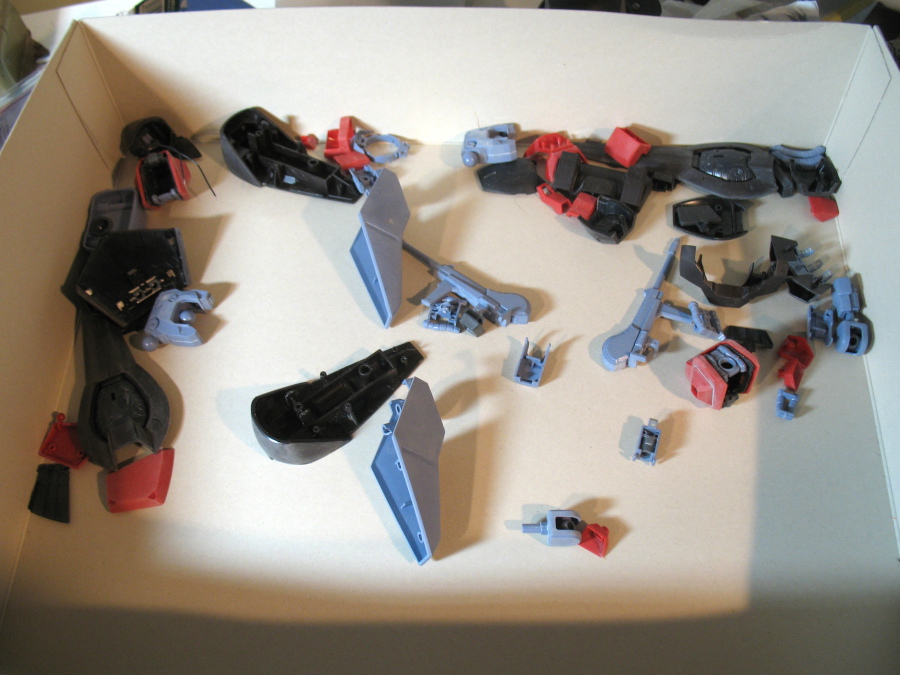

With all the sanding I did on the surface of this kit to remove sink-marks, it left a lot of dust on everything. To deal with it I decided to give the parts a cleaning. This is something I used to do to all my kits, but in more recent years it’s become more rare that I’ll do this.


Next up, the parts will be primed, and I’ll think about specifics of the paint job. It’s exciting to see this project come together. The one week rush didn’t work out for me but it was actually a lot of fun and it felt good to make so much progress.
Post a Comment