Recent work
By tetsujin on 2008-09-18 in Models
Tags: 1:144 Queadluun Rau, 1:144 Zaku "Death Face", 1:35 Scopedog, MG Zaku v2.0, 旧キット
Currently I have three projects on the bench that were painted and near completion, but not quite finished, so lately I’ve been trying to finish them up. The first is a 1:35 scale Scopedog I was working on for the July 2007 MMC (I missed the deadline). The second is a 1:144 Queadluun Rau I was working on for the February 2008 MMC (I missed the deadline). And the third is a 1:144 HGUC Zaku that I did for the March 2008 MMC (I met the deadline, but I felt the model wasn’t entirely “done”… I intend to do some more finishing work on it.)
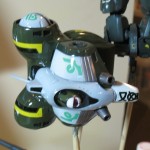
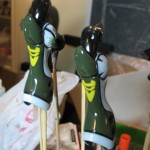
Mostly over the past couple weeks I’ve been glossing and decaling the Queadluun Rau. Two things I noticed during this process: first, my Future spraying procedure wasn’t getting a good gloss (I think I’d cut the Future with Windex, it left kind of a rough finish, which caused problems with the decals…) The second thing I noticed was that my decal solvent, “Micro Sol”, apparently doesn’t do a damn thing. Fortunately I had some Solvaset on hand, that seems to do the job a lot better – in my next order I’m gonna pick up some Mr. Mark Softer and try that, too…
Anyway, after several iterations of piercing the decals and hitting ’em with Solvaset, I finally decided to move on to post-decal gloss. My goal here is to make those decal edges invisible – So people could look for those decal edges, shine a light on ’em, whatever, and not find ’em. So far I think I’ve been pretty successful – it’s just a matter of hitting the area with a sufficient number of Future layers, and then once it’s dry sanding it smooth with 4000 grit sanding cloth… The sanding helps to feather the edge of the decal down to meet the (ever thicker) surrounding Future coat. Leaving the clear film border around the marking intact actually leaves a helpful margin for this work…
Of course, there’s another problem with the decals – This model is from the 1997 reissue, and it’s been sitting around for all that time, and the decals have yellowed a bit. I don’t know how to solve that… Unfortunately it’s especially noticeable on the white areas of the model, like the missile pods on the legs…
Not too much coverage of the Zaku and Scopedog there I guess… The Scopedog was a bit of a fiasco – after glossing it I did a sort of half-assed wash and then sprayed on “dust” color – way too much of it. I wound up taking most of it off and glossing over the rest. So lately I’ve been reglossing it so I can redo the wash and maybe give it better weathering, too.
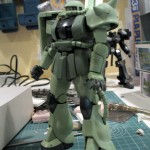
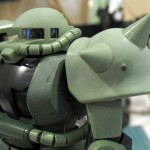
In between all that, I’ve been tinkering with the MG Zaku v2.0. This is a kit that I have some mixed feelings about, but I decided to mostly OOB it. lately I’ve been in the process of reducing the number of parts I need to deal with, sanding the kit’s surface to eliminate seam lines and sinkholes, and adding 2mm “minus molds” into the featureless little recessed circles all over the kit. The minus molds were my first departure from the “plain Zaku” look with this kit – before that I hadn’t decided if I wanted to erase some of the kit’s detail and go for a slightly more “classic” Zaku look, or what… Ultimately I just decided that adding minus molds would be fun, so I did it. Of course, now I’ve run out, so I have to wait for more to arrive from HLJ. :D

Post a Comment