君は生き延びることが出来るか?
By tetsujin on 2010-08-02 in Models
Tags: MG_Gundam
I’ve had this project in the works for a while now, though I never posted any WIP on it until just now:


This is, of course, the original Master Grade Gundam, the first Master Grade ever, released in 1995. I have a great appreciation for the early Master Grades. I love how their design focuses on both honoring the original design, and on lending it credible details. I also love their relative simplicity. I do appreciate the kind of poseability that a modern MG offers, but I don’t always need that. Often I’m quite happy to have a kit that looks nice and is affordable. Additionally, I don’t always enjoy building inner frames and such. Sometimes when I work with old kits from the 1980s I find their simplicity refreshing. Old MGs are like that, but they’re also prettier than most 1980s kits. I’m not too fond of the direction the MG Gundams have taken since the v1.0, either… In particular I think the v2.0 is butt-ugly. It’s supposed to capture the “retro look” and win on the basis of nostalgia – but it really doesn’t capture the look of the original Gundam very well at all, so it’s mostly just bland. I think the G30th design is an improvement – it’s kind of a weird mish-mash of design elements from older versions of the Gundam (including the MG v1.0) but it’s a pretty good look, I think. Hopefully they’ll do a MG of that… Though with Real Grade, who knows… They may not.
Anyway, this is mostly a straight build, but with a few minor changes:
First, I used the detail parts included with the kit (and a few borrowed from a MG GM kit) to add a bit of “scale detail” to the thing. I’m not sure exactly what the different pieces are supposed to represent. The triangular ones I figure are stowage hooks: so someone could run a cable through those hooks to attach various necessities to the exterior of the machine. (Of course, not all the hooks I put on there are really in good places for that…) The rectangular bar things I figure are used to lift the Gundam or its parts. (Actually it seems like a little U-shaped hook, like on the Scopedog, would be better for attaching cables for suspension… but whatever. My other guess for these bits was “ladder rungs” but I wasn’t interested in putting a ladder up the side of the Gundam) Since the Gundam separates, there’s hooks on the shoulders, to lift the top half (or the whole Gundam), and hooks on the side skirts to lift the bottom half when the top’s not attached. I also put some on the arms… I have no idea what those would be good for.
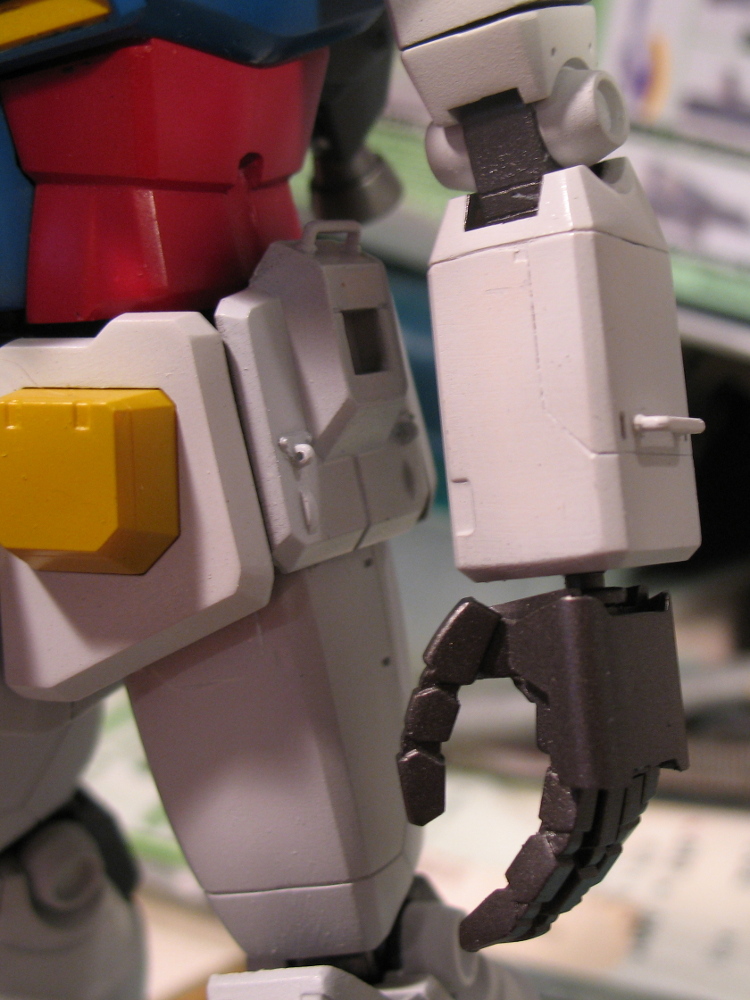
Second, I replaced the kit-supplied hands with Kotobukiya “1:100 Custom type” hands. These are nice-looking, very cheap injection-molded hands for robot kits, but there’s one major issue with them if you want to use them with Gundam stuff: the “Custom type” hands are made to fit Kotobukiya weapons, so MG weapons won’t fit. I altered the gun hand to fit the beam rifle, and built the whole set of six hands.
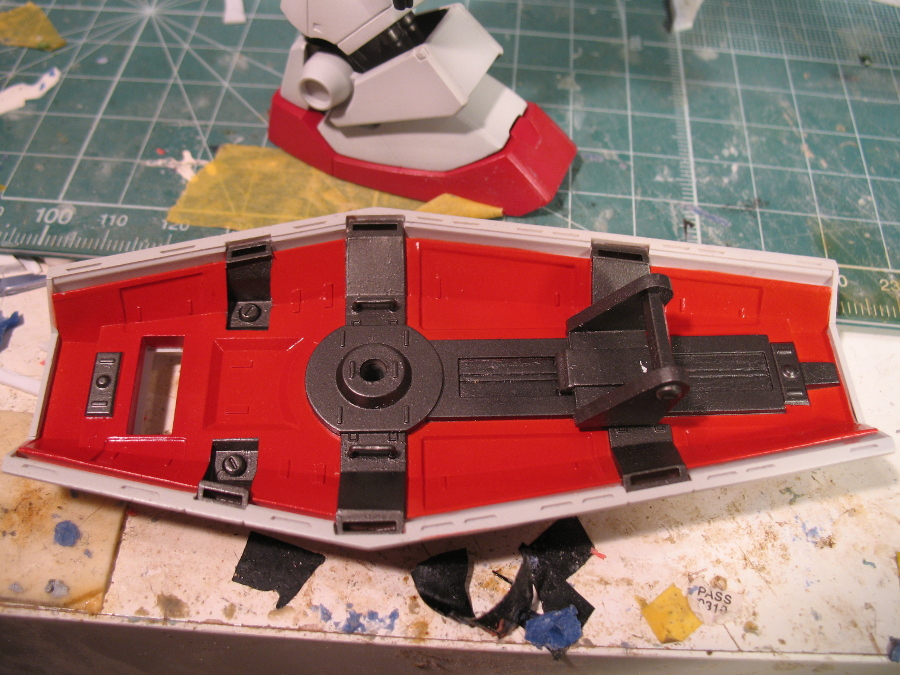
Third, I provided a new grip for the shield, and cut away the other two pegs on the kit part for placing the grip in alternate positions. The kit-supplied grip was relatively undetailed, and it had a big mold-parting line down the side of it… and the grip was made out of vinyl, so removing that seam would have been difficult, and paint wouldn’t have stuck to the part anyway. I made the replacement out of styrene strip and plates, with a hexagonal rod for the grip and two “minus mold” parts for a bit of detail. It was very easy to make.
Fourth, while the stock kit has a gimmick for flipping up the top of the head, and mechanical details inside the head, I mostly got rid of that – primarily because I think the stock kit has some alignment issues with the face… and whether there’s alignment issues there or not, I don’t like the position of the face… And I also wanted to slot out the face for easy painting… And I wanted to eliminate the gaps between the sides of the head and the “scalp”… So at present the flip-top gimmick still works but some of the internal detail was cut away… Ultimately I’ll probably glue the scalp down.
Fifth, the arms originally had an opening panel – a nice feature, but the panels never really closed properly. At best they’d close but there’d be irregular gaps between the panel and the rest of the arm and an irregular surface across that seam… So I altered the panels to fit better, glued them down, and rescribed the lines.
Sixth, various other panel lines were rescribed… For instance, detail on the front of the legs (molded from the side), detail on the sides of the knee guard (molded from the front), things like that…
The paint scheme is obviously pretty standard. My plan for this build was to go with the full-on clown colors, no excuses and no apologies. But there are a few choices I made that I think stand out:
- The vents are yellow, but the housings around the vent slats are blue. Originally the Gundam didn’t have a distinct housing around the vent slats, the vents were just embedded into the front of the chest. But the MG Gundam made the vents a more distinct feature, similar to how they look on Zeta designs like the Mk.II or GM II. Usually this style of vent is painted all-yellow, but I thought it’d be interesting to make the housings blue. This was a bit of a masking challenge, since on the original MG the whole vent is just one yellow part.
- I painted the back of the shield red. This is anime-accurate, in fact, but the real reason I did it was ’cause I thought it’d be an interesting change from the usual. Initially my plan was to leave the back of the shield white and paint some details metallic – but I tried this and didn’t like it, so I decided to take a cue from the anime.
- The beam rifle’s painted in a two-tone scheme of metallic and navy blue… I’m not entirely sure I like it. Actually at first the foregrip was metallic as well, but I decided there was too much metallic so I repainted the part. I thought about painting the whole thing navy blue and being done with it, but decided instead to stick with the two-tone. If nothing else it’s a little different from the usual look.
- Head vulcans are done in the same metallic (Alclad magnesium) as the joints and hands and so on, instead of the more anime-accurate yellow or gold.


At this point, most of the painting is done… I think there’s still some spot-painting to be done here and there, but for the most part it’s ready for the first clear coats and the markings. I look forward to finishing this one – this kit is a real classic.
Post a Comment