HGUC Zaku #84 “Completed” (mostly)
By tetsujin on 2011-08-07 in Models
Tags: 144 Zaku Project, sockmonkey
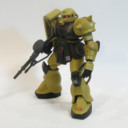
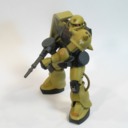
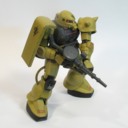
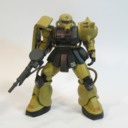
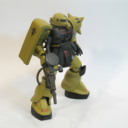
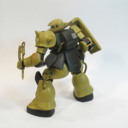
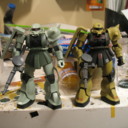
In the last few days before Otakon I made an effort to finish up the HGUC Zaku so I could display it in the Otakon model contest. I was basically successful; the model was in a state that I could reasonably call “finished” and the Zaku won “Best in Show” in the Gunpla Builders World Cup event held there. However, I don’t consider this model to be quite “finished”: I had wanted to do more weathering, probably some filters or something, and I wasn’t able to get to that prior to the con. Still, the model is in a good state now and so I wanted to share some photos of it.
I decided once again to go with a fairly “Real Type”-looking decal scheme for this model. Most of the decals come from a Bandai “Gundam Decal” sheet. (GD-39, “Zeon MS #4” with MSV/Real Type-style decals for the HGUC Zaku II, Zaku I, Gouf, and Gelgoog) I supplemented this with a few ALPS decals (specifically the 0080-style Zeonic crest) and some other, more generic decal sheets.
One quirk of the GD-39 set is that it includes numerous high-visibility “06” markings intended for the front skirt, elbows, and knees. I’ve generally stayed away from this kind of marking in the past: if I put the mobile suit’s model number on there, it was usually just one place, and fairly small. There’s no practical reason to plaster the model number all over the machine – if anything you would want to see an identification number for the specific unit. But I decided to go with it this time. The best rationalization I could come up with it is that it was perhaps for the sake of propaganda, making the Zaku as recognizable as possible at a time when it was unrivaled on the battlefield.
Animation Tests
Animation was one of the things I had in mind when building this model was making it suitable for animation. In general this means making the model as simple as possible to deal with, minimizing the number of things that have to be adjusted by hand for each frame of animation. I haven’t got a proper stop-motion system set up at present, but I wanted to try animating, so I did these basic tests using just the digital camera.
A few areas of this model are a bit difficult to animate: the eye has a tendency to stick when it’s being posed, and the helmet must be removed and replaced each time the eye’s position is changed. Additionally, the mobility of the ankle joint is hindered slightly by the leg modifications, and limitations of the elbow and knee joints inherent to the HGUC kit do limit the figure’s range of poses somewhat. Another difficulty was that when I attempted to move one part of the model, such as the arm or head, I could easily wind up changing the model’s footing or posture without intending it. This shows up a bit in the “heat hawk” test. Part of dealing with this is simply learning the right way to do things: how to hold the figure to minimize these sorts of effects… But proper stop-motion software with the onion-skinning feature is very helpful as well, as it provides a useful reference for correcting such errors when they occur.

Based on this first experience animating this model there are a few changes I’m considering: I may rebuild the monoeye and head interior with the aim of making it easier to work with. I don’t think there’s a way I could pose the eye without having to remove the helmet (unless I leave out the clear visor part) – but if the helmet were held on with magnets instead of friction I think it would be much easier to remove and replace correctly and consistently. Additionally, there can’t be any significant amount of friction impeding the eye’s movement: it must be very easy to turn. The paint I had to apply to the monoeye and its pivot shaft was a real problem there. A better option would be to use plastic that already has the light-blocking properties I need, such as metallic-gray parts from an Armored Core kit or something. But the overall construction of the monoeye for a Zaku with a head this large could be much simpler than what I did for this project, and that would help as well.


Post a Comment