By tetsujin on 2008-09-28 | In Armored Core Group Build, Models | 2 Comments
Tags: 1:72 Armored Core "Cherry Bomb", CR-LH99XS
When I first started buying Kotobukiya’s Armored Core kits, my intention was to come up with relatively easy builds that would be unique enough to be distinctive. Most of the configurations I’m building are based on ideas I’ve developed in the game: I don’t necessarily feel my model projects should be limited to what works well in the game but I do enjoy using the game to experiment with different ideas, and I also enjoy the idea of building models of designs that I actually use in the games.
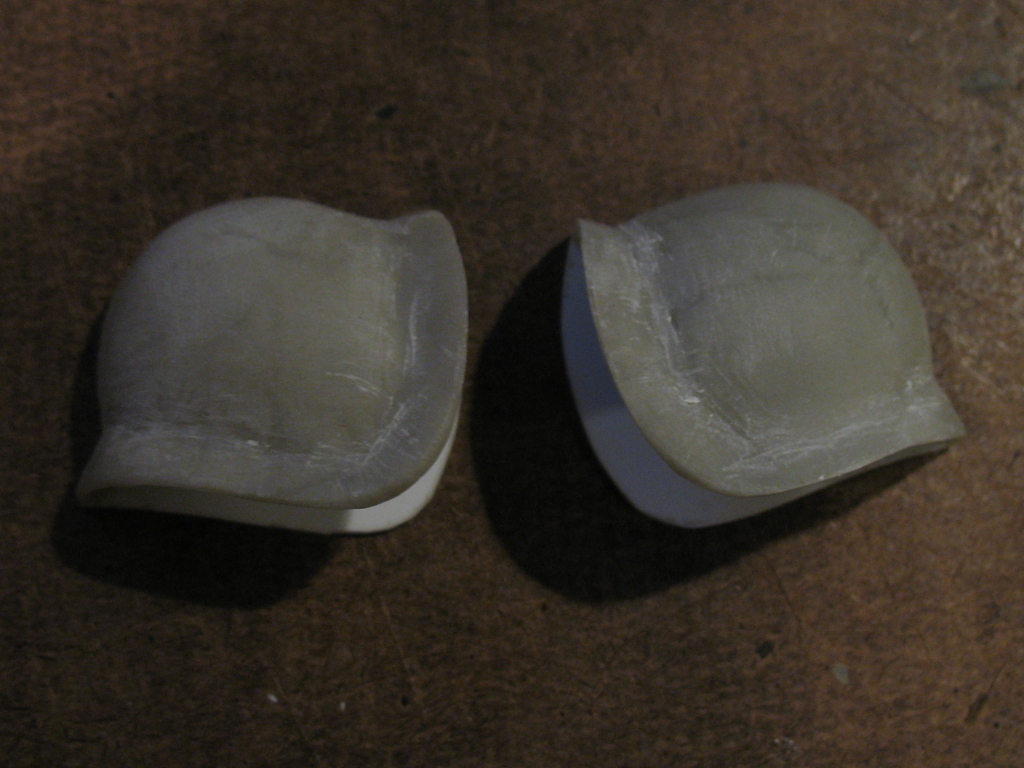
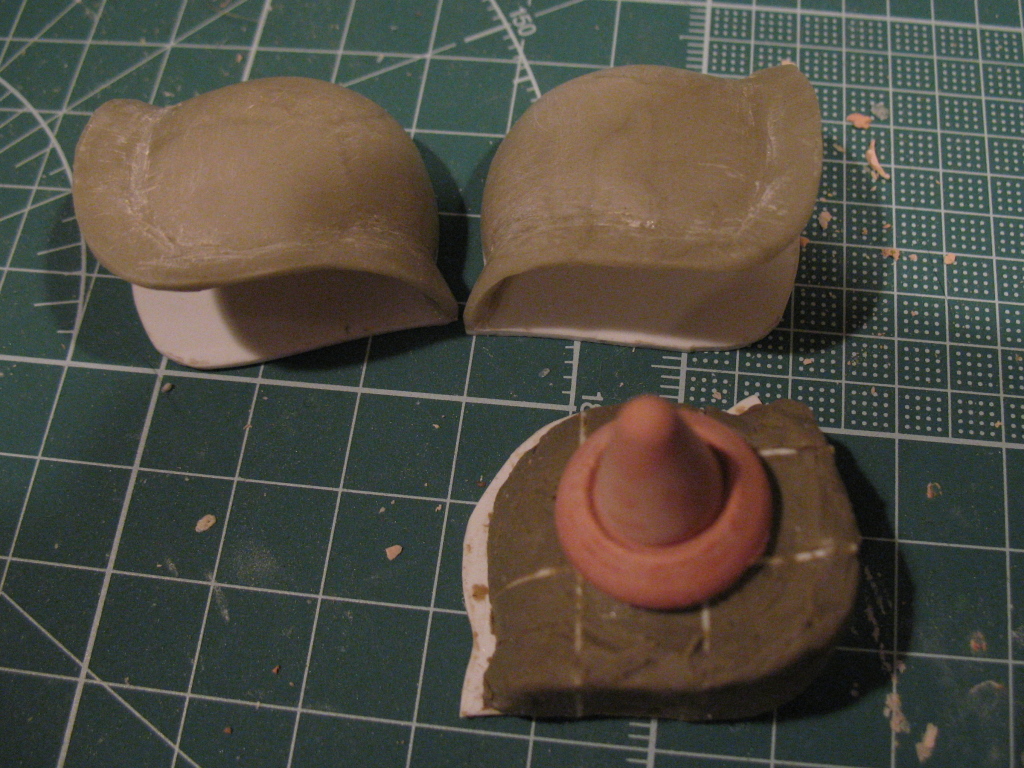
AC “Cherry Bomb” originally started as AC “Cherry Breaker” – the concept was for a fast, overboosting AC armed with a parrying blade (high-damage melee ramrod weapon – it’s hard to hit with it and you have a limited number of times you can use it…) However, I found that by replacing the parrying blade with a linear rifle, I had a configuration that worked very well for me in arena battles against the computer: a configuration based on speed and precision with a single weapon. Gradually I’ve abandoned the “Cherry Breaker” concept in favor of “Cherry Bomb”.
Read the rest »
By tetsujin on 2008-09-18 | In Models | No Comments »
Tags: 1:144 Queadluun Rau, 1:144 Zaku "Death Face", 1:35 Scopedog, MG Zaku v2.0, 旧キット
Currently I have three projects on the bench that were painted and near completion, but not quite finished, so lately I’ve been trying to finish them up. The first is a 1:35 scale Scopedog I was working on for the July 2007 MMC (I missed the deadline). The second is a 1:144 Queadluun Rau I was working on for the February 2008 MMC (I missed the deadline). And the third is a 1:144 HGUC Zaku that I did for the March 2008 MMC (I met the deadline, but I felt the model wasn’t entirely “done”… I intend to do some more finishing work on it.)
Read the rest »
By tetsujin on 2008-07-11 | In Armored Core Group Build | 2 Comments
The Group Build page is now online and I’ve created this new post category where I will post updates related to the group build – things like summaries of the progress on various projects, new projects added, projects completed, and so on.
There have been a couple people so far who have said they might participate in the group build – their projects will be listed on the group build page once I have some information from them. For my part, I’m resuming work on the Crest “Close Combat Type” I started last year for the MMC Armored Core contest. In terms of part preparation that project was just about ready to be painted by the time I stopped work on it – but some issues with LED lighting and wiring held me up. I will be resuming that project and then hopefully also have time to finish one of my other Armored Core projects before the deadline.
Remember, if you’d like to participate, please leave a comment on the group build page and I’ll put your project on the list.
By tetsujin on 2008-07-10 | In Armored Core Group Build, Site News | No Comments »
Kotobukiya’s Armored Core kit line is probably the best injection molded robot kit line to come out in recent years – and yet, it seems exceedingly rare that anybody posts so much as a WIP thread for one, let alone a finished kit. I tried (and failed) to motivate the Armored Core fans out there last December with the “Armored Core Contest” on MMC (nobody finished their entries – not even me!) – now, I’ve decided to try it again.
This time around it won’t be a contest – just a group build hosted here on Scope Eye. I’m thinking of probably a late October deadline, not any particular “rules” or anything, just an effort to motivate AC builders and make people aware of other people’s AC builds.
If you’d like to participate in the build, you can leave a comment here. Once builds are under way there will be a group build page here on Scope Eye linking to people’s WIP and/or finished models. People can participate simply by providing a link to their own website where the build progress is being updated, of course, but if people are willing I’d like to host a couple of images of each entry here, too, so the group build information can survive even if people’s URLs change…
By tetsujin on 2008-06-13 | In Models | No Comments »
Tags: 1:100 Zaku Kai, Blender
There were a few problems with my first Zaku Kai walk cycle (I’d messed up a keyframe which caused the left leg to intersect the foot during the stride – and additionally the animation had an excess of hip movement) so I did a new one and rendered it properly. It turns out rendering on my machine at work is a whole lot faster than the machine at home – rendering the walk cycle at home took a good chunk of an hour (single core, 1.8 GHz, etc.) while at work (four cores, 2.8GHz, etc.) it took a couple of minutes…
Read the rest »
By tetsujin on 2008-06-02 | In Models | No Comments »
Tags: 1:100 Zaku Kai, Blender
Yesterday I finally tried my hand at animating a walk cycle with the Zaku. This is a bit tough for a few reasons. First off, the Zaku’s lower legs and feet are huge, which makes clearing the ground in the passing pose a bit of trouble. Second, the way the Zaku is modeled, in its “rest” position the knees are actually bent backward (they don’t look it, it’s just the way it worked out since the hip joint is near the front of the leg and the knee joint is near the back of the leg and the ankle joint is a bit forward of the knee – to give the joints more clearance this is necessary) so IK was a bit of trouble. Finally, there’s very little clearance between the lower leg and the foot – so if the two don’t match up closely they’ll intersect.
Read the rest »
By tetsujin on 2008-05-27 | In Models | No Comments »
Tags: 1:100 Zaku Kai, Blender
I recently picked up the book The Essential Blender and have found it very helpful in learning more about the Blender application. With the animation chapter as my guide I produced a simple animation of my Zaku Kai mesh – the robot itself is standing still but the camera spins around it… I know it seems like a painfully simple thing to do, conceptually speaking, but the significance for me is that now I know how to use Blender’s animation tools – so I’ll feel a lot more comfortable trying to do more complex stuff later on.
Read the rest »