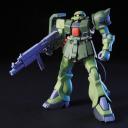
More HGUC Zaku Kai

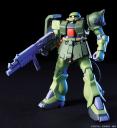
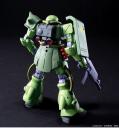
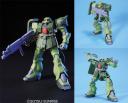
I had been updating my previous HGUC Zaku Kai post with different images as I found them – but I thought for this one I’d start with a clean slate… New, larger images of the fully colored HGUC Zaku Kai are now available…

Front view, colorRear view, colorHGUC in a few poses

I’ve cooled to this new kit quite a bit over the last few weeks. It’s not the Zaku Kai I want to see – I always expected the worst should Bandai ever get around to kitting this design again… The fact that this kit wasn’t “the worst” was sort of a pleasant surprise, and I still feel like it has some merit to it… And I’ll no doubt get one, for comparison if nothing else… But it’s ceased to be an exciting release for me. It’s long past time that I got back to serious work on my own build.

Lately I’ve been working on the 3-D CG version of my Zaku Kai, trying to work out the design of parts that I hadn’t fully fleshed out before – the position and shape of joint parts, mostly – in order to work out what gets built next and how to go about it. I’m also trying to find ways to improve the model’s posability, and work out at a practical level what the finished model will be capable of in terms of poses.

So there’s a HGUC Zaku Kai now…

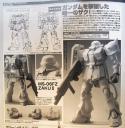
Larger, full-page scan of the HGUC Zaku Kai announcement

I just found out last night that Bandai is finally releasing a HGUC Zaku Kai. This is exciting news but of course it’s a little scary, too, ’cause I don’t know what this will ultimately mean for my Zaku project, if I might lose my motivation or something as a result of this… But in any case it’s exciting news, and based on the initial prototype pics I think they’ve got a pretty good sculpt. Based on lineart for the new kit that’s been published, it looks like Katoki did this one – the lineart appears to be a refined version of the old MG Zaku Kai lineart draft… For comparison I’ve posed my Blender model in roughly the same pose, to see how the two designs differ.

HGUC Zaku Kai lineart by Katoki HajimeHGUC Zaku Kai (test shot photo)Color pic of the HGUC Zaku KaiMy Blender model, put into roughly the same pose as the HGUC

My model clearly has a lot more bulk to it, and a lot more emphasis on the appearance of bulk in areas like the legs. By comparison the HGUC model has much straighter lower legs, somewhat similar in form to the MG Zaku v2.0. Proportionally the HGUC chest is smaller and narrower, the head may be larger, etc. Looking at my design in comparison with the HGUC – I’d say that that’s a very unflattering angle for my chest block design. I would almost consider redesigning my chest block again, maybe slim it down a bit. I’ll give it some thought anyway…

Compared to the old 1:144 kit, the new HGUC is much less squat, the head is closer to the proper size, and the backpack is much improved. Overall the proportions are a lot more palatable than the old kit.

Overall my reaction right now is that I want to see more of the new kit. I think it may be too soon to judge the new kit decisively. The new kit is in some ways a bit “watered down”, particularly in the legs and the chest – but it’s a look that works pretty well. The one area that really concerns me is the lower legs – I think they look reasonable but I’m not entirely sure they look reasonable enough. The head bothers me a bit – it’s too large compared to the chest block… I want to get a better look at the skirt armor, too – to me, the skirt armor is one of the most attractive things about this design, so I’m eager to see in greater detail how Bandai interpreted it.

As 0080 HGUCs go I think this one is pretty good – most of the 0080 Zeon HGUCs had a tendency to shy away from the bulkiness of the original designs – I guess this one is no exception – but I think this one may be good enough to OOB (oversized hands notwithstanding) – and as HGUCs go it seems like a winner. It’s like the HGUC Alex or HGUC Zeta – not perfect kits by any means, but great examples of just how good the HGUC line can be…

Belly Design Work

Lately I’ve been working on the design of the belly part of the Zaku, and thinking about how I can improve the model’s posability a bit. Part of me feels like this is a waste of time – better to make the model look good than to make it posable, and poor posability can be overcome by creating a customized static-pose version of the model… Still, part of me wants to show off, I guess, and make my Zaku capable of a lot of what the new MG kits can do…

In terms of leg and hip posability for kneeling poses, the Zaku Kai has some advantages and some disadvantages relative to the new MG design… Its knees can bend pretty far, around 130 degrees, though the new MG’s knees can go a lot farther… The skirts are a problem, not so much because of their size as the fact that they are situated far enough forward that it’s hard to get the legs to clear them… And since I’ve kept the giant feet of the original design, that also complicates kneeling poses and seriously limits walking poses. On the bright side, the midsection has potential for a level of flexibility that can overcome a lot of the limitations of the hips and legs.

The midsection of the Zaku Kai is intended to represent some sort of flexible fabric cover concealing inner mechanisms. (You can see this in the MS Era book – there’s a shot of a wrecked Zaku.) I’m not going to implement it as a flexible part, but even with the belly built up as a rigid part, there’s enough clearance between the belly and the skirts that there’s a lot of potential for flexibility.

My design so far has been for a ball joint somewhere inside the belly part, with a rod extending down into the hips. The rod could then slide up or down to provide more clearance for different poses. Not the most convenient system admittedly but I expect it’ll look good and still provide a good level of posability. Initially I designed the belly part for the standing pose, and then posed it as I would the model (keeping the belly part rigid, rather than deforming it, to simulate how the model would work.) The problem with this was that by bending the belly part forward and to the side, and sliding it up enough so the cockpit could clear the front of the “belt”, a big gap opened up. To some extent this is unavoidable – it’s just a consequence of using a rigid part to represent a flexible one.

The new design I’m experimenting with has a few changes. First off, there’s a cuff that extends up from the hip area to hide as much of the belly part as possible without being too noticeable. Second, the belly part extends down lower, almost to where the legs meet the hips, when the Zaku is in a normal standing pose. The belly part tapers at the bottom, too – so that when the belly slides up for more clearance, it’s a narrower section of belly that coincides with the top of the cuff. Then when the belly tilts on its ball joint, the tapered area of the belly part moves to the edge of the cuff and the gap between the two is largely negated. The idea is to make it so that, instead of seeing an abrupt termination of the belly, the viewer instead sees a recession. Hopefully this will make the gaps opened by extreme poses less noticeable…

I did make a few mistakes in these images. In the first, the belly has a texture image, and the left foot is misplaced… In the second, the left foot is correctly placed, but the belly has no texture image – thing is, I haven’t yet adjusted the UVs for the belly part to correct its texture mapping, so for now I just cleared out the texture.

Initial rigid belly design in “Bazooka” poseNew rigid-belly design in “Bazooka” pose

Queadluun Rau project: Missed the deadline…

I was working on this project for the MMC Female Mecha Contest – I got quite far on it but unfortunately it just wasn’t enough to meet the deadline. At this point I have all the basic colors done (except the red dome on top of the head – I forgot about that) – but I didn’t even get as far as putting the first gloss coat on it, let alone applying decals, washes, etc.

Closest I’ve yet come to meeting an MMC deadline with a new project, so I guess that counts for something. :D

Head Cables, Backpack Work, etc.

Since the last WIP update I’ve mostly been working on the backpack. The extra care taken this time through has really paid off, and the backpack part is nearly complete. I’ve mounted it to the chest block using styrene rods and polycaps: this makes it a lot easier to establish correct position and alignment for the chest parts and also a lot easier to take photos of the model as it currently stands.

Tonight I spent a bunch of time on the head: refining the cut of the eye visor, checking the halves against each other and re-joining them, trying to get the wall thickness of the part thin enough and more uniform, and adding the parts that host the ends of the power cables on the head. This all was a bit difficult since the head part as it is is a bit fragile, at least when put under stress (like being gripped while I sand or carve part of it down). The head came apart at the seams a few times and once or twice it came apart in other places, too. Rejoining the broken head parts gave me the opportunity to make the alignment better – but also the risk of making it worse, too.

I think this part, due to its shape and the way I made it, is going to be difficult to get really precise. The whole thing is one big compound curve, for starters, and the cross-section guides I used when sculpting it initially weren’t especially straight – which means that I periodically make the mistake of looking at the line where that guide was, expecting it to be a horizontal line, only it’s not. There’s no specific frame of reference for measuring what’s correct and what isn’t. If I can’t find a way to deal with this problem I may need to start over. Hopefully it won’t come to that.

I scrounged up some 1.5mm spring, magnet wire, and Kotobukiya Mobile Pipe to see how the head would look with its power cables attached:

Site Status Update

So, last time I posted site news here it was because I’d just barely gotten the thing on-line and looking vaguely reasonable. Now things are looking a bit more together, though still more than a bit rough around the edges. The main thing is that now I’ve got most of the model-building information from my old site online in a nice format, where before I’d have had to redirect you to the mirror of the old site in order to get photos of any of my projects or anything like that…

At this time I’d like to reflect on why I finally chose to get a real web host. Basically, most of it comes down to one thing:

Comcast Sucks

You’ll hear a lot of people saying Comcast this and Comcast that, and I know that people aren’t normally inclined to believe it when someone has something bad to say about Comcast, but hear me out. For starters, they promised to upgrade the web storage their subscribers would get, from a measly 25MB up to 1GB. Great news, right? What a fucking waste of time. They promised that upgrade within the month, and now four months later still nothing. Any time I wanted to upload something to my Comcast page I had to delete something. I’m sick of it, and I’m sick of their bullshit excuses about why they haven’t got it done yet. In reality that storage upgrade is vaporware. They told people they’d upgrade web storage just to keep them from jumping ship. Well, now that my webpage and e-mail address are hosted somewhere else, there’s nothing keeping me with Comcast should I ever decide it’s time to jump ship…

That’s the short version, at this point I feel like Comcast’s not worth the effort for any further criticism. They just suck, OK?

The move to real hosting has had all kinds of great features. A slight increase in available storage (approx 2000000% more storage than Comcast provided), PHP, SQL, Jabber server, Unix shell access – and quite reasonably priced. Good stuff.

Because I have some elbow room now, I’m not only bringing out the content from my current Comcast webpage but also bringing back stuff that I was forced to delete to save space. But beyond just porting over that content I’m trying to improve the webpage as well. You may have noticed some of these innovative new features:

  • Instead of a bit of text linking from a page to an image, the link displays a smaller version of the image, conveniently scaled to about the size of one’s thumb.
  • Linked images load through an elaborate client-side programming structure, allowing one to toggle one’s way through the images without navigating away from the page in which it is presented
  • Work-in-progress data is now presented through a dynamic “web logging” system, in which data may be organized chronologically or divided up into various catergorizations
  • Individual web pages on the site now include a standardized linking structure which allows one to quickly redirect the browser back to other, largely unrelated areas of the site.
  • Web site now features a rectangular graphic at the top of each page, with which the reader is reminded of what site they are currently visiting

Of course this all is terribly revolutionary, ground-breaking stuff, taking my web presence far beyond the simplistic organization of the old site. I think other people on the web will probably see what I’ve done here and go, “Hey, that’s a good idea. I should do something like that, too.”

The site’s still not quite done yet, but I think it’s far enough along now that I’d feel OK about posting new WIP and such on it. Oh, and there’s no current plans to start a web forum, if anyone’s wondering. :D

I actually have had this sitting around on my computer since 1996…

Welcome to Scope Eye!

For those who don’t know me, my name is George. I am a coder and a modeler. Online I usually go by the name “tetsujin”, sometimes by “1-4-4” or just my initials, “gec”. This is my new website. I’m still just getting it set up at this point, so bear with me. I may put in some sort of animated “under construction” thing just for pure comedic value.

(EDIT): Here you go, these have been sitting around on my computer since 1995 and 1996, respectively…

This one’s been on my computer since 1995…I actually have had this sitting around on my computer since 1996…

This space will be home to information about me, my model-building work, and various coding projects I may do from time to time. Until all that’s ready you can see a copy of my old webpage here. If it looks kind of primitive, it’s only because it is.

Now if you’re wondering why the site is called “Scope Eye”… Well, “Tetsujin.com” was taken. :D “Scope Eye” is the name of a head part in Armored Core 2 – but it’s also a tribute to all the cool robots out there that buck the “human face” trend for something more fundamental: monoeyes, camera turrets, all that good stuff.

Sockmonkey Sandrock WIP (2008-01-12)

New changes:

  • Rejointed the arm
  • Built up the front contour of the lower leg a bit with putty so the vents on the knee armor will have the right shape, once I add them
  • Made the cockpit hatch and crotch part narrower

I had wanted to rejoint the kit’s elbow, mainly to improve the looks of the elbow joint. Rejointing the elbow is easy enough with parts like Wave T-Shaft, but since the new joint doesn’t swivel as well as bend I had to add the swiveling function back onto the arm. This time around I decided to do this by replacing the shoulder joint with a Yellow Submarine “Ball-shaped joint” – a 10mm spherical hinge. This also means the shoulder peg will have to be replaced with some kind of socket. The joint could just barely fit into the modified shoulder armor – I don’t know exactly how much range of motion the arm will have but I think it’ll be pretty good.

The arm work was mostly improvised. It was more experimentation than planning, and as a result I actually wrecked the right upper arm during the first attempt at this modification. Adding the joints wasn’t a problem, but as part of the process I decided to make the upper arm slimmer: that temporarily turned the upper arm into a very fragile assembly. The part was to be reinforced on the inside with epoxy putty, but when the putty cured I discovered that the part was crooked – so at that point I gave up on it and started over with the other arm. To resolve the issue I’m going to recast the modified left upper arm to replace the wrecked part.

The situation with the knee vents on the lower legs is a bit complicated. The kit doesn’t have the knee vents molded in (and there is absolutely no excuse for that! No draft angle issue or anything…) but additionally, the area where the vent is supposed to be should be rectangular, but because of the shape of the lower leg it’s actually not. The “calf” pods on the lower legs actually extend forward past the front edge of the shin. Rather than reducing the calf pods or separating the shin from the calf and reattaching them, I decided to just bulk up the shin a little, just enough to provide the knee armor a relatively flat surface to sit on. I was worried that adding that bulk to the front of the lower legs would make the shins appear too thick: I think that’s still a possibility but so far it seems OK.

Basic OverviewSide ViewArm joint detail

Sockmonkey Sandrock WIP (2008-01-09)

Didn’t break a lot of new ground today: I cut the right shoulder to match the left (still needs some work of course) I also refined the beard, hollowed out the vulcan cannon area, and added the plates to either side of the face.

Current State

Sockmonkey Sandrock WIP (2008-01-02)

Tonight I made the left lower leg narrower by 2mm (but made the knee guard .5mm wider), trimmed down the left shoulder armor, and reduced the length of the fringe at the base of the helmet by about 1mm. The shoulder armor change was something I decided on a while back: after looking at the lineart and the B-Club Sandrock I decided that the shoulder armors on the sockmonkey were too large and also not contoured quite right. Even after the reduction, the shoulder is quite large, but now it has a bit of a more sleek look to it. The lower leg change looks promising but I think the knee guard area still needs work. I’m very happy with how the head’s shaping up, I think particularly once I whip up a V-fin for it it’ll look really nice.

At this point I don’t have a good idea of how far this project is going to go in terms of refinement. Certainly there’s lots that could be done – any given part of the kit seems to benefit greatly from a little care and attention – but there’s other projects lined up once this one’s done, so I’m trying to resist the urge to go too far with it.

OverviewPhoto-edited for symmetryTop View